Creating a Site
Sites are your spatial units for monitoring and reporting. Clean site setup avoids downstream data issues because geometry drives everything: satellite sampling, GIS overlays, survey planning, and repeatability.
In MariMap, a site can represent:
- An ecosystem monitoring area (coral reef, seagrass, mangrove)
- A restoration facility (nursery, lab, in-water/out-of-water context)
Wizard steps (what you will configure)
1) Site category
Choose between:
- Ecosystem: coral/seagrass/mangrove monitoring sites (polygons expected)
- Facility: restoration facilities and operational sites (point or boundary)
2) Site type (and facility context)
If you chose Ecosystem, select the ecosystem type you monitor.
If you chose Facility, you will also choose:
- Facility type (for example: coral nursery, coral lab)
- Water context (in-water vs on-land, depending on facility type)
3) Site information (required fields)
- Open
Sitesand selectCreate site. - Add:
- Site name (required): stable name used in selectors and reports.
- Country (required): used for region context and reporting.
- External site ID (optional): use if you already have site IDs in another system.
- Description (optional): add context for what the site is and how to access it.
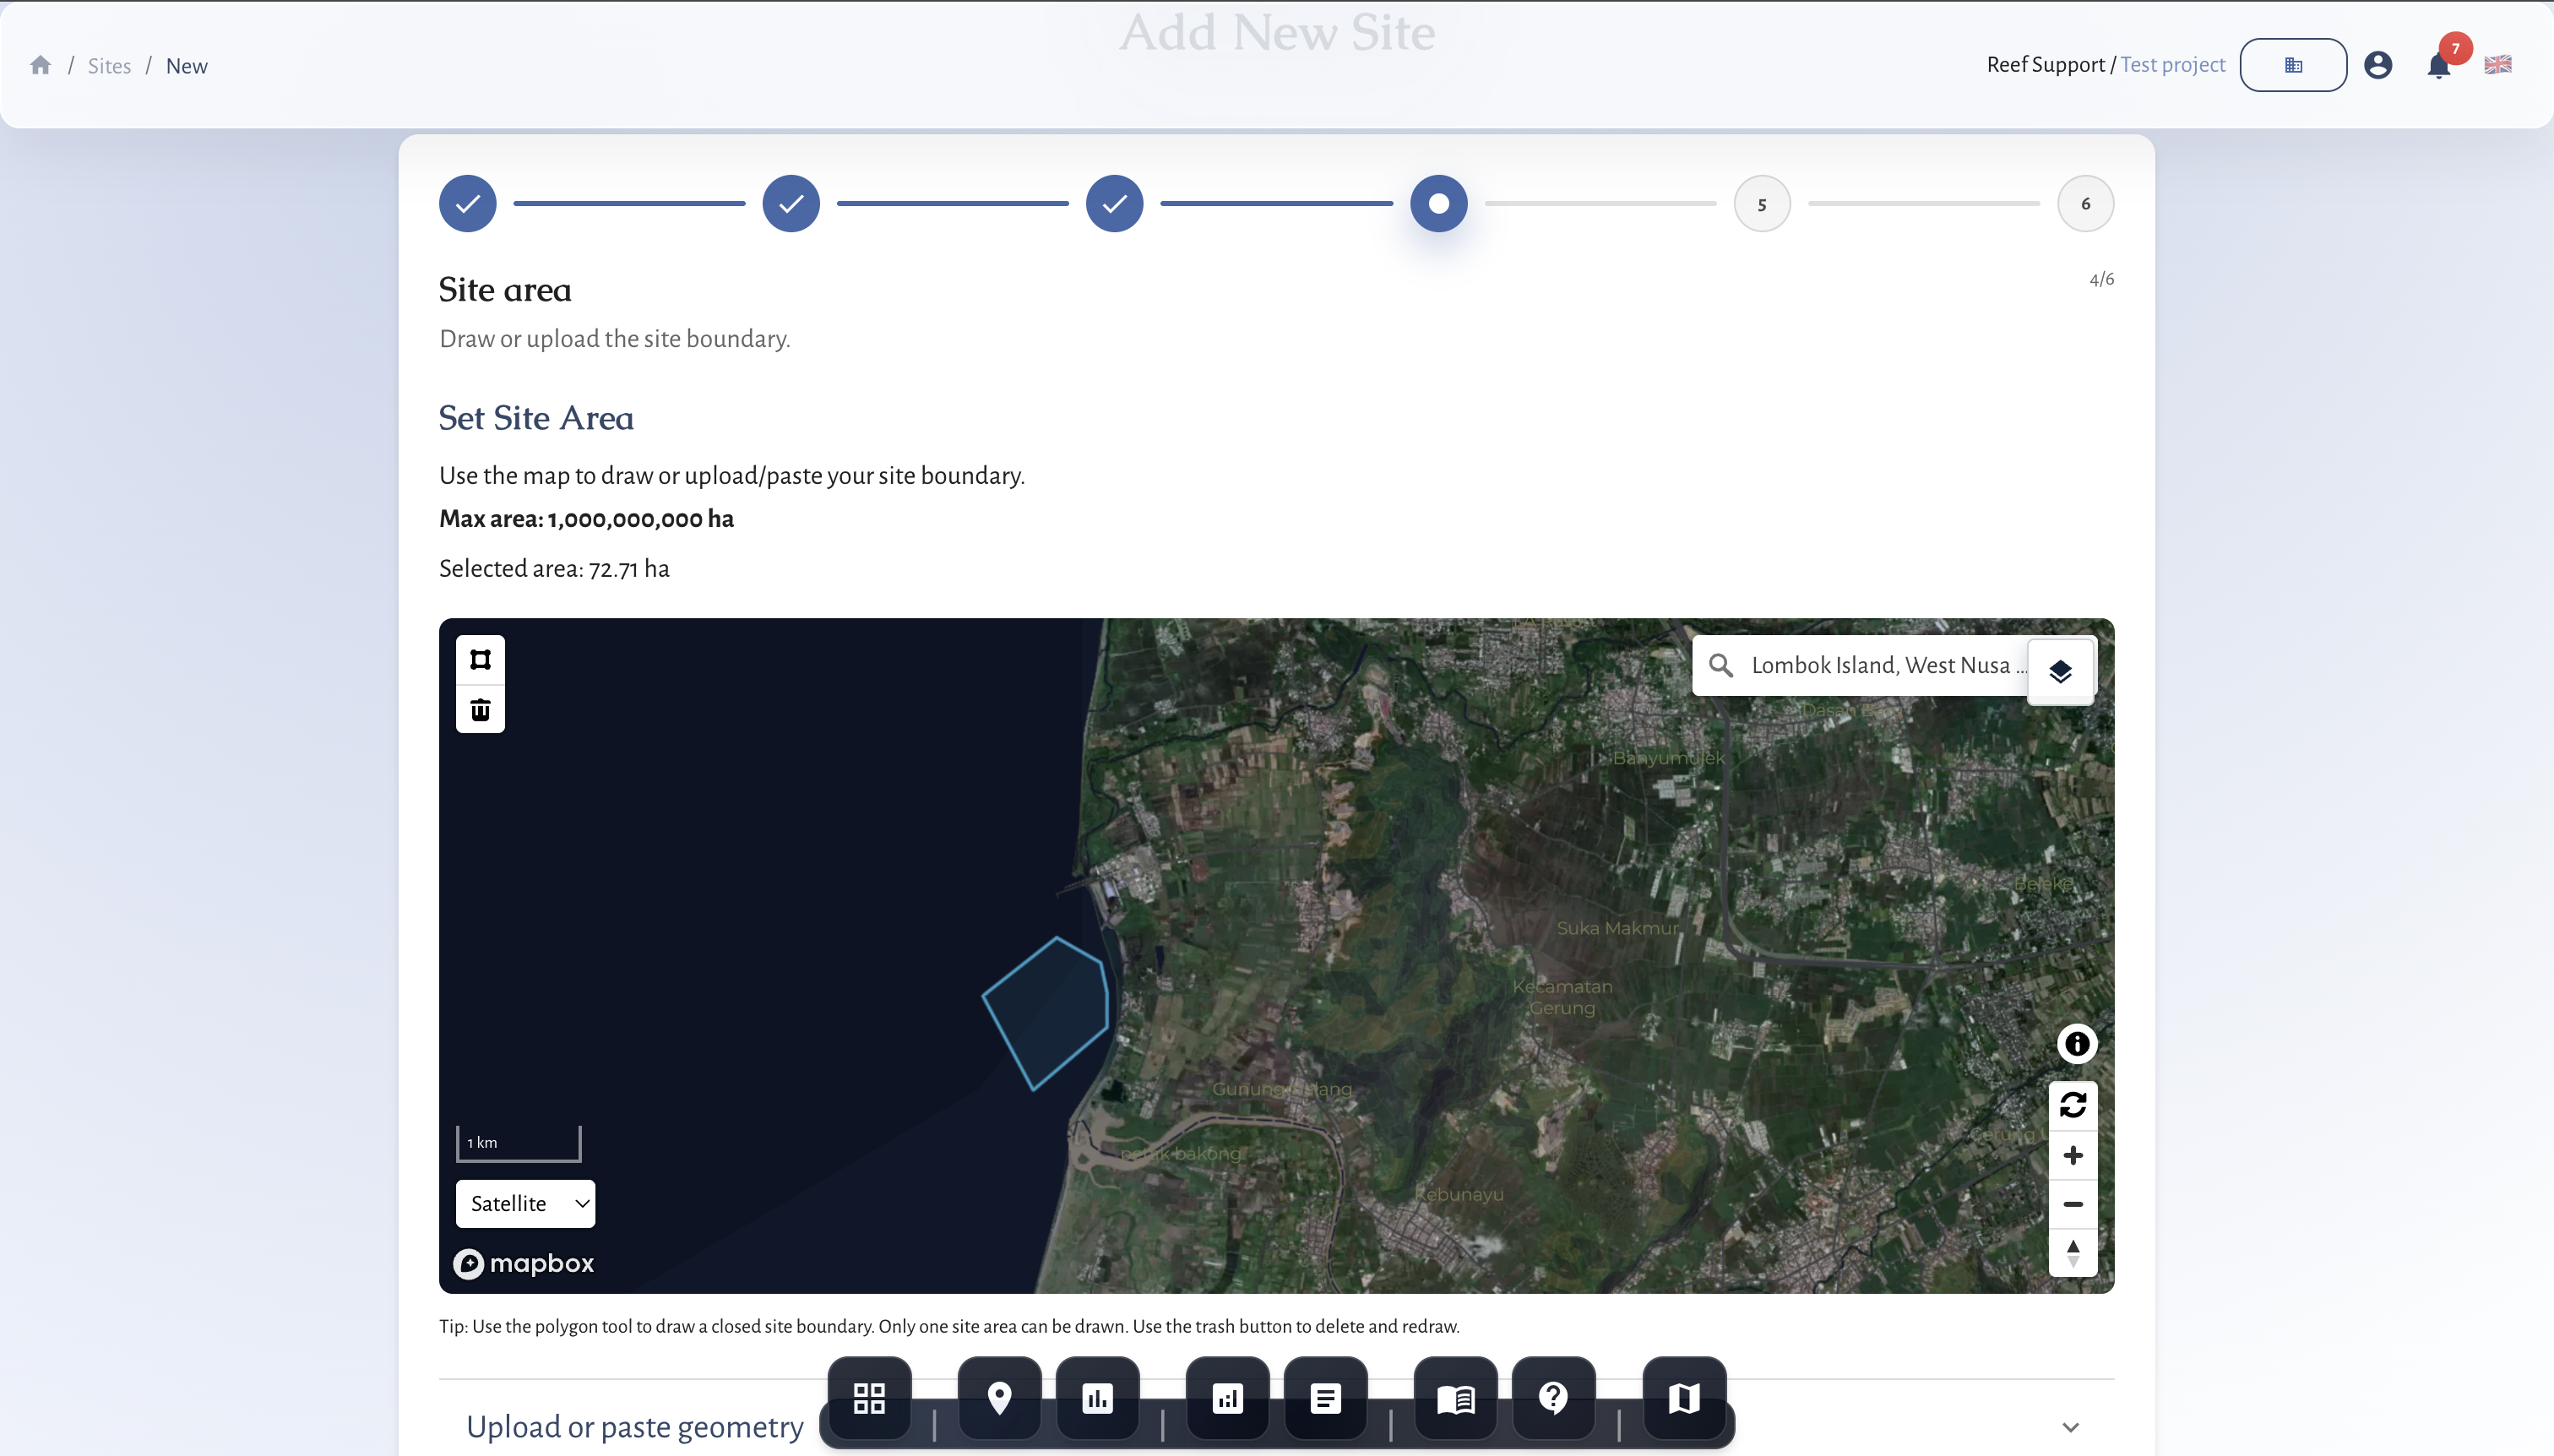
Define site boundary
- Choose geometry:
- Ecosystem sites: draw a polygon boundary (recommended).
- Facility sites: add a point or boundary (depending on how you represent the facility).
- Draw geometry in the map view, or upload
GeoJSON/KML. - Validate boundary placement against imagery and context layers.
- Save and confirm the site appears in the site list.
Geometry quality checks
- No self-intersections (valid GeoJSON geometry)
- Correct coastal footprint (don’t include large inland areas unless intended)
- Use stable boundaries for repeat monitoring (avoid “moving” polygons between survey cycles)
- Consistent naming and ID format across teams
- Site is created in the intended project (scope matters)
Optional: Site metadata (protection, tenure, privacy)
MariMap supports optional site-level governance metadata. These are recommended when you operate in partnership contexts or have rights/tenure constraints.
- Protection level (optional): record protection classification (MPA, OECM, etc).
- Tenure type (optional): record tenure or customary tenure context.
- Site privacy: defaults to project privacy unless you choose one.
- If the parent project or organisation is private, site privacy is typically locked to Private.
- Data sharing agreement status: whether data sharing requires an agreement (useful for partner workflows).
- Data sovereignty status: whether FPIC/customary tenure/sovereignty considerations apply (useful for FPIC-aligned workflows).