Creating a Survey Plan
Survey plans make field execution repeatable. Teams should avoid ad hoc survey setup when long-term comparability matters.
Survey plans are the recommended way to:
- Reuse the same sampling geometry across repeat surveys
- Keep protocols consistent across field teams
- Pre-configure taxa filters (so data entry is constrained and standardized)
- Schedule recurring monitoring (optional)
Wizard steps (what you will configure)
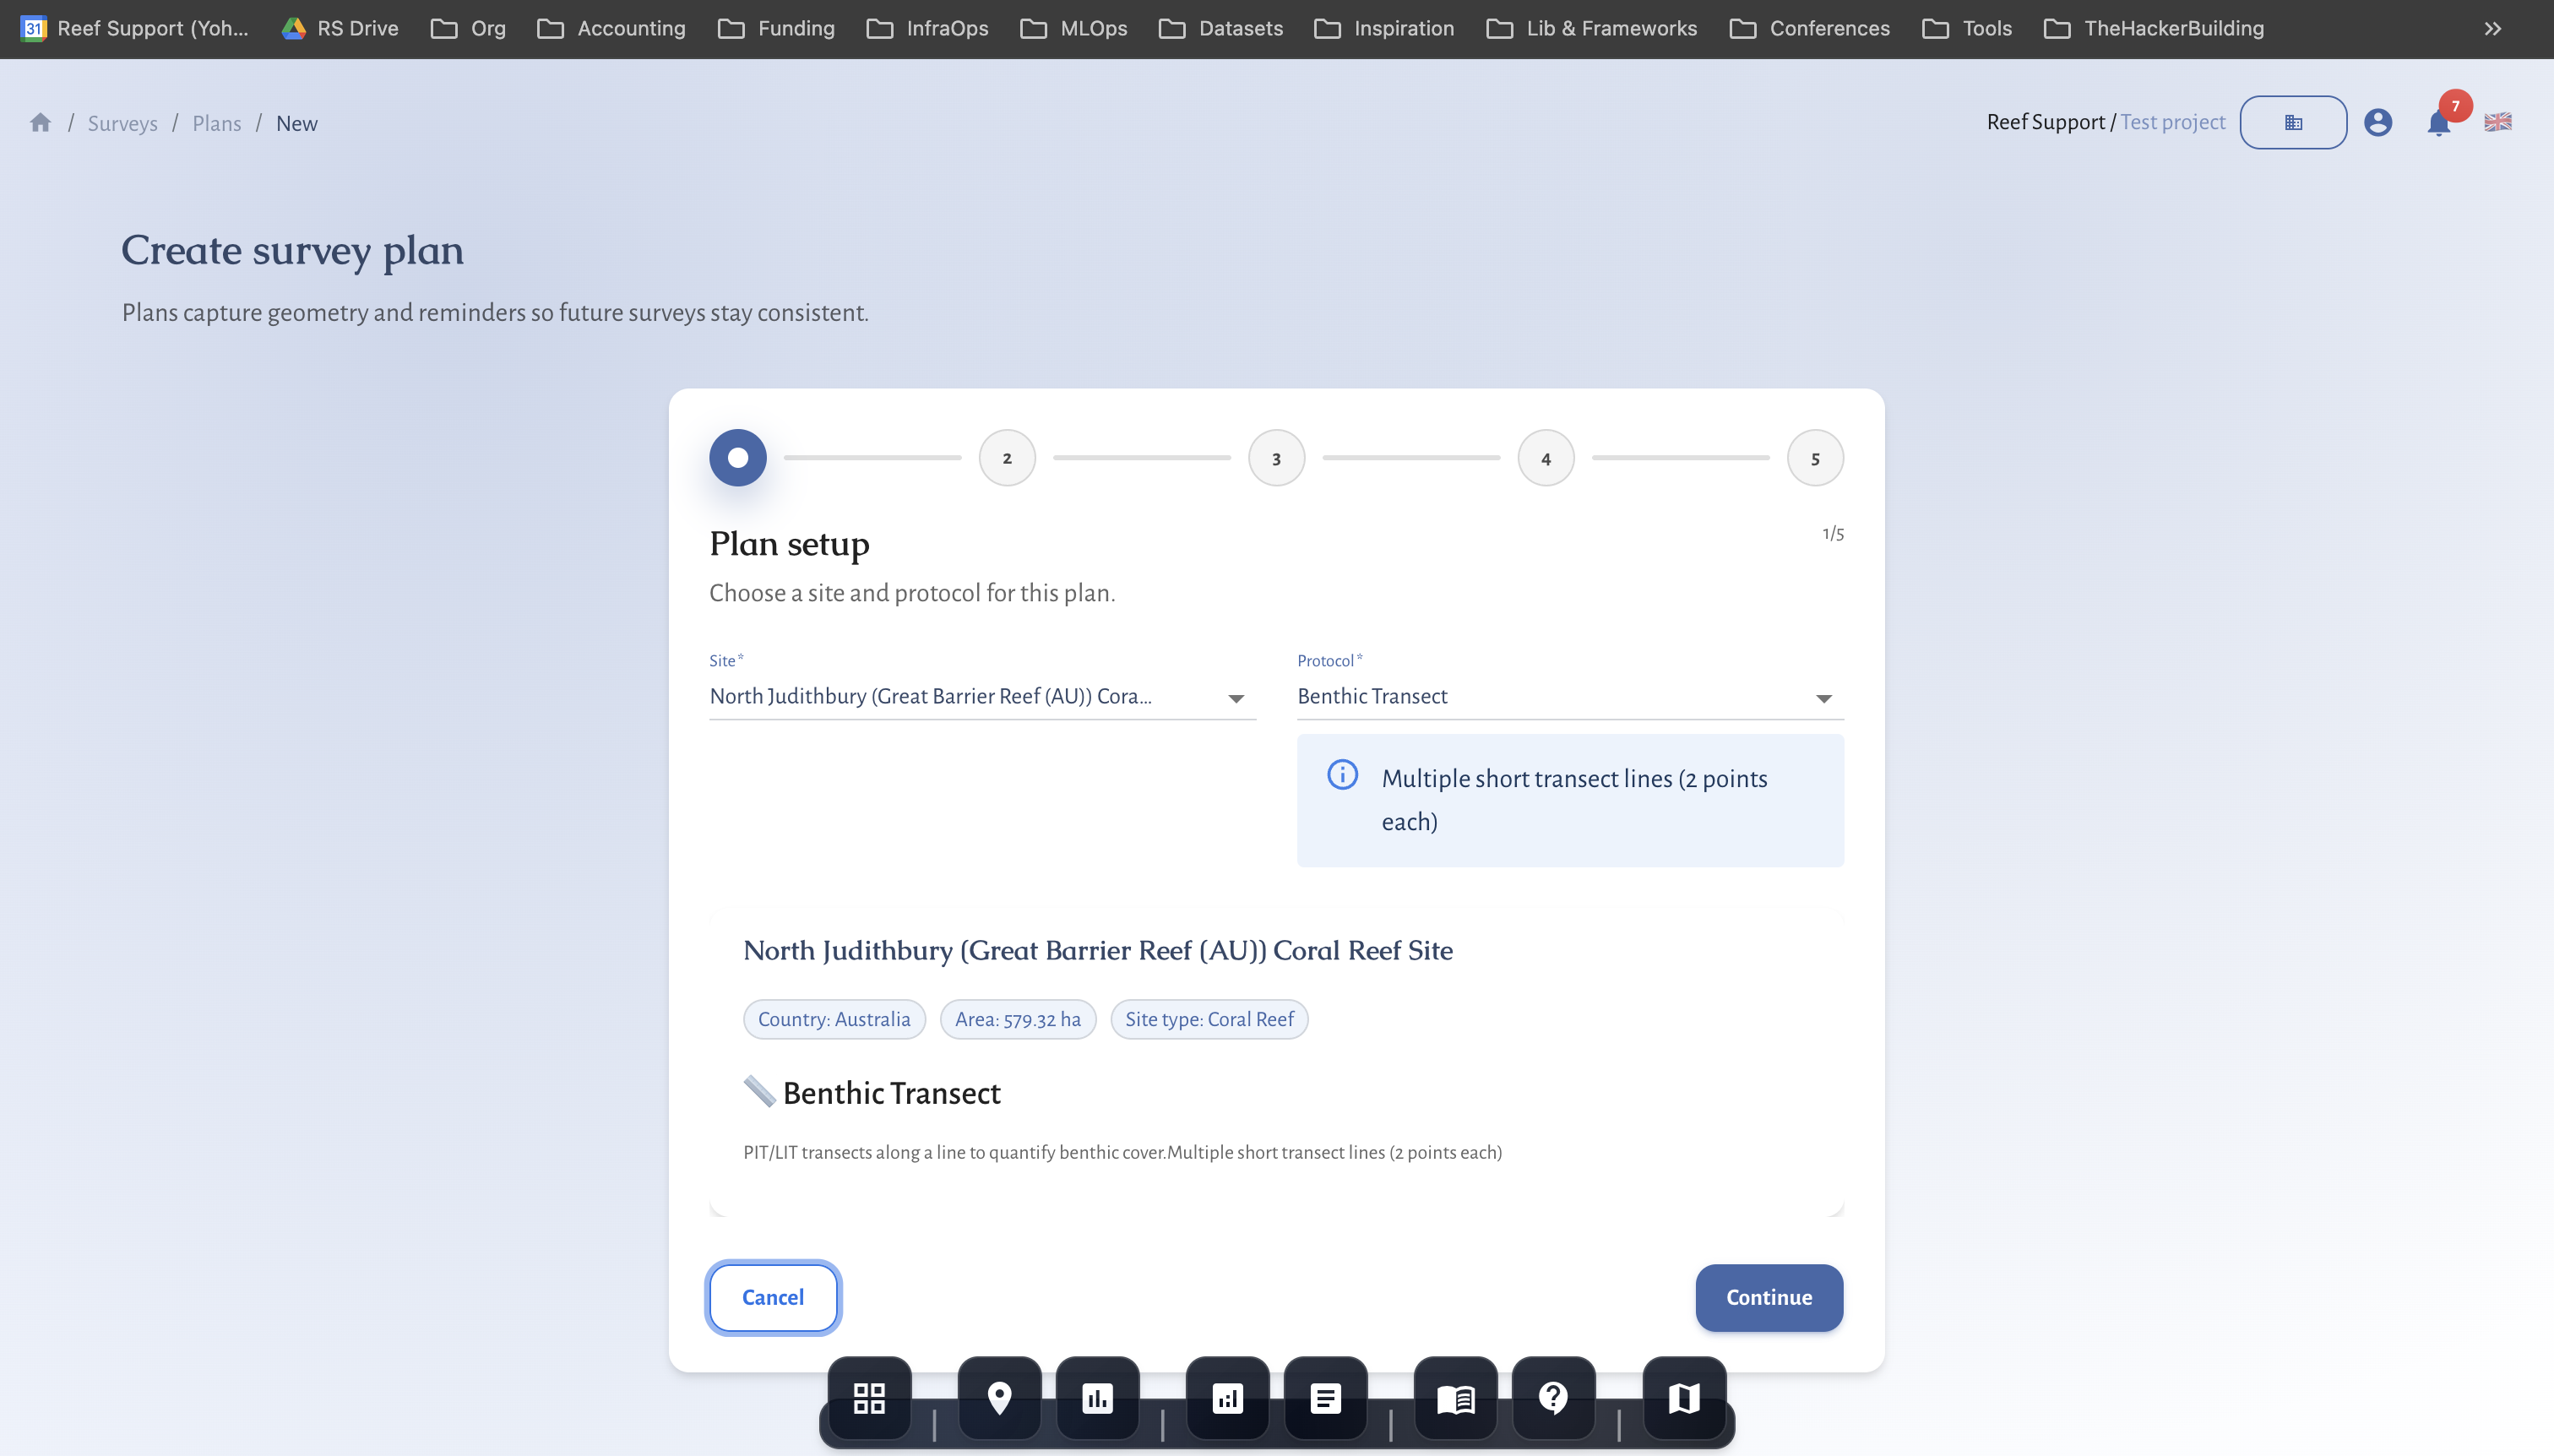
1) Plan setup
Choose the site and protocol (method) the plan will be used for.
Common protocols include:
- Mangrove tree growth
- Fauna observation
- Benthic transect
- Fish belt transect
- Benthic images / photopoints
- Coral fragment monitoring (facility workflows)
Protocol hints in the UI help you choose appropriate geometry.
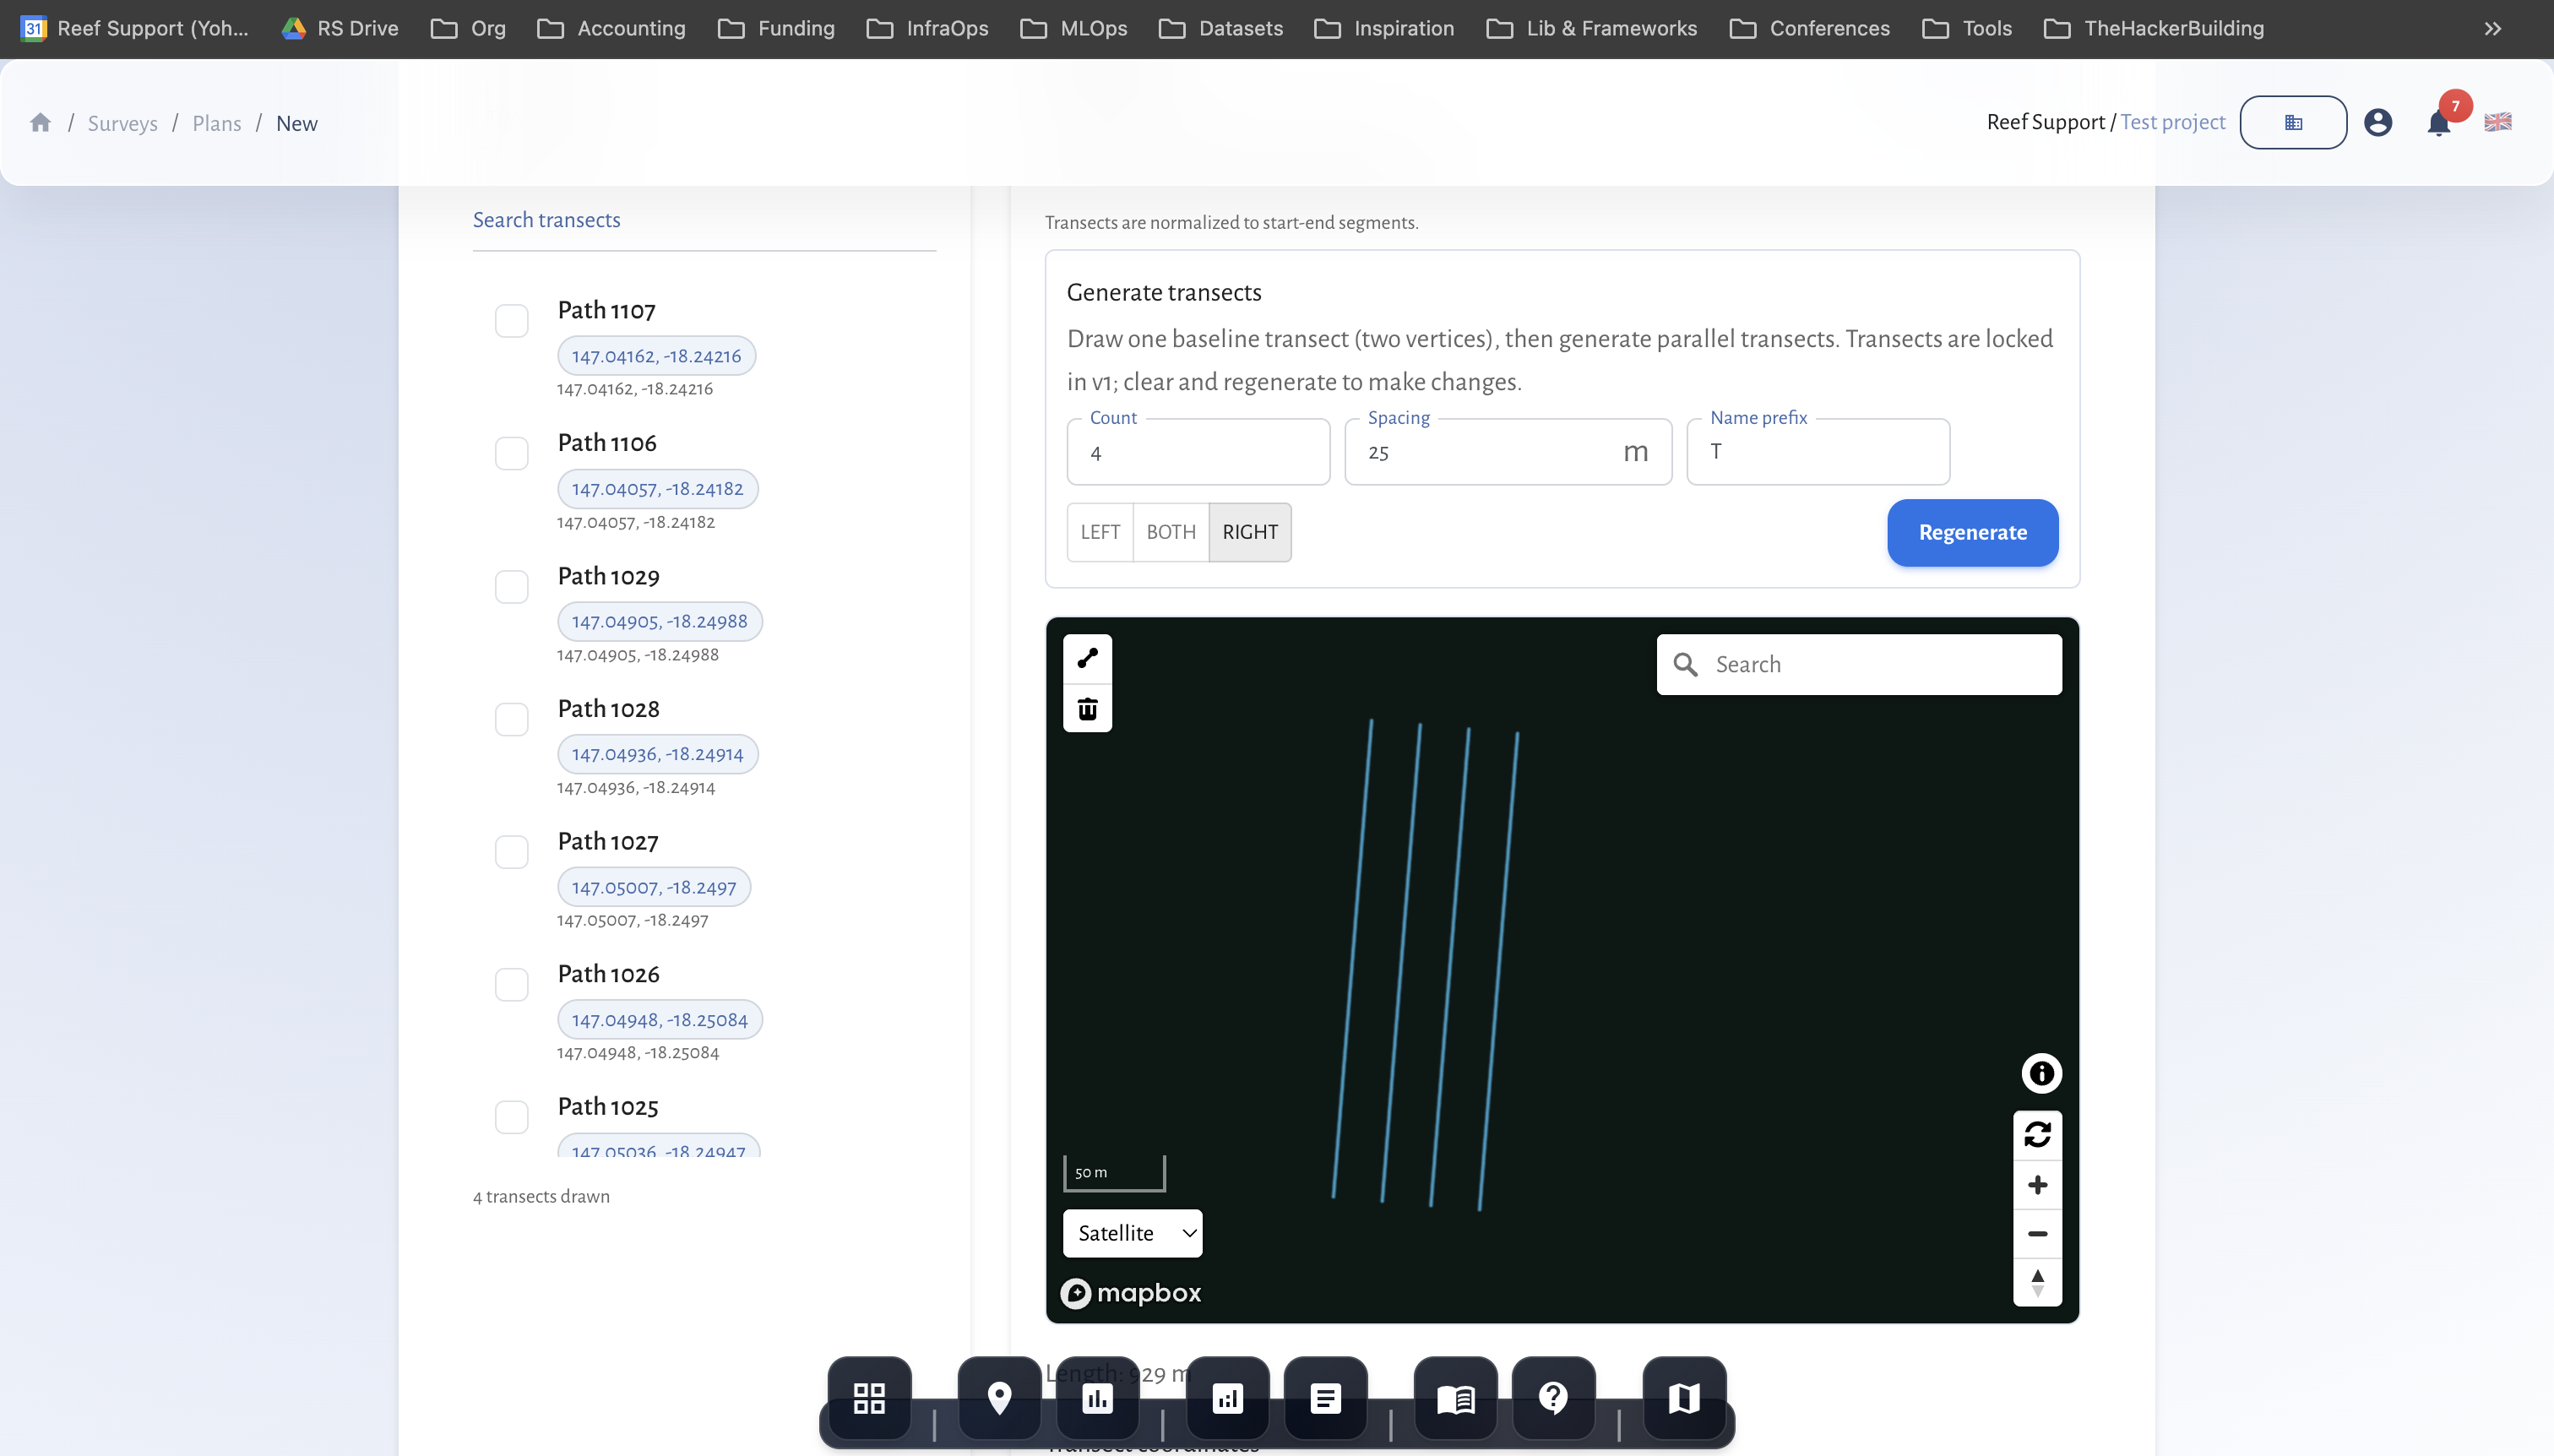
2) Geometry & units
Add sampling geometry inside the site:
- AOI polygon (area-of-interest boundary)
- Transect lines (two-point lines)
- Point sets / photopoints
You may also be able to select existing sampling units (paths/areas/units) depending on site setup.
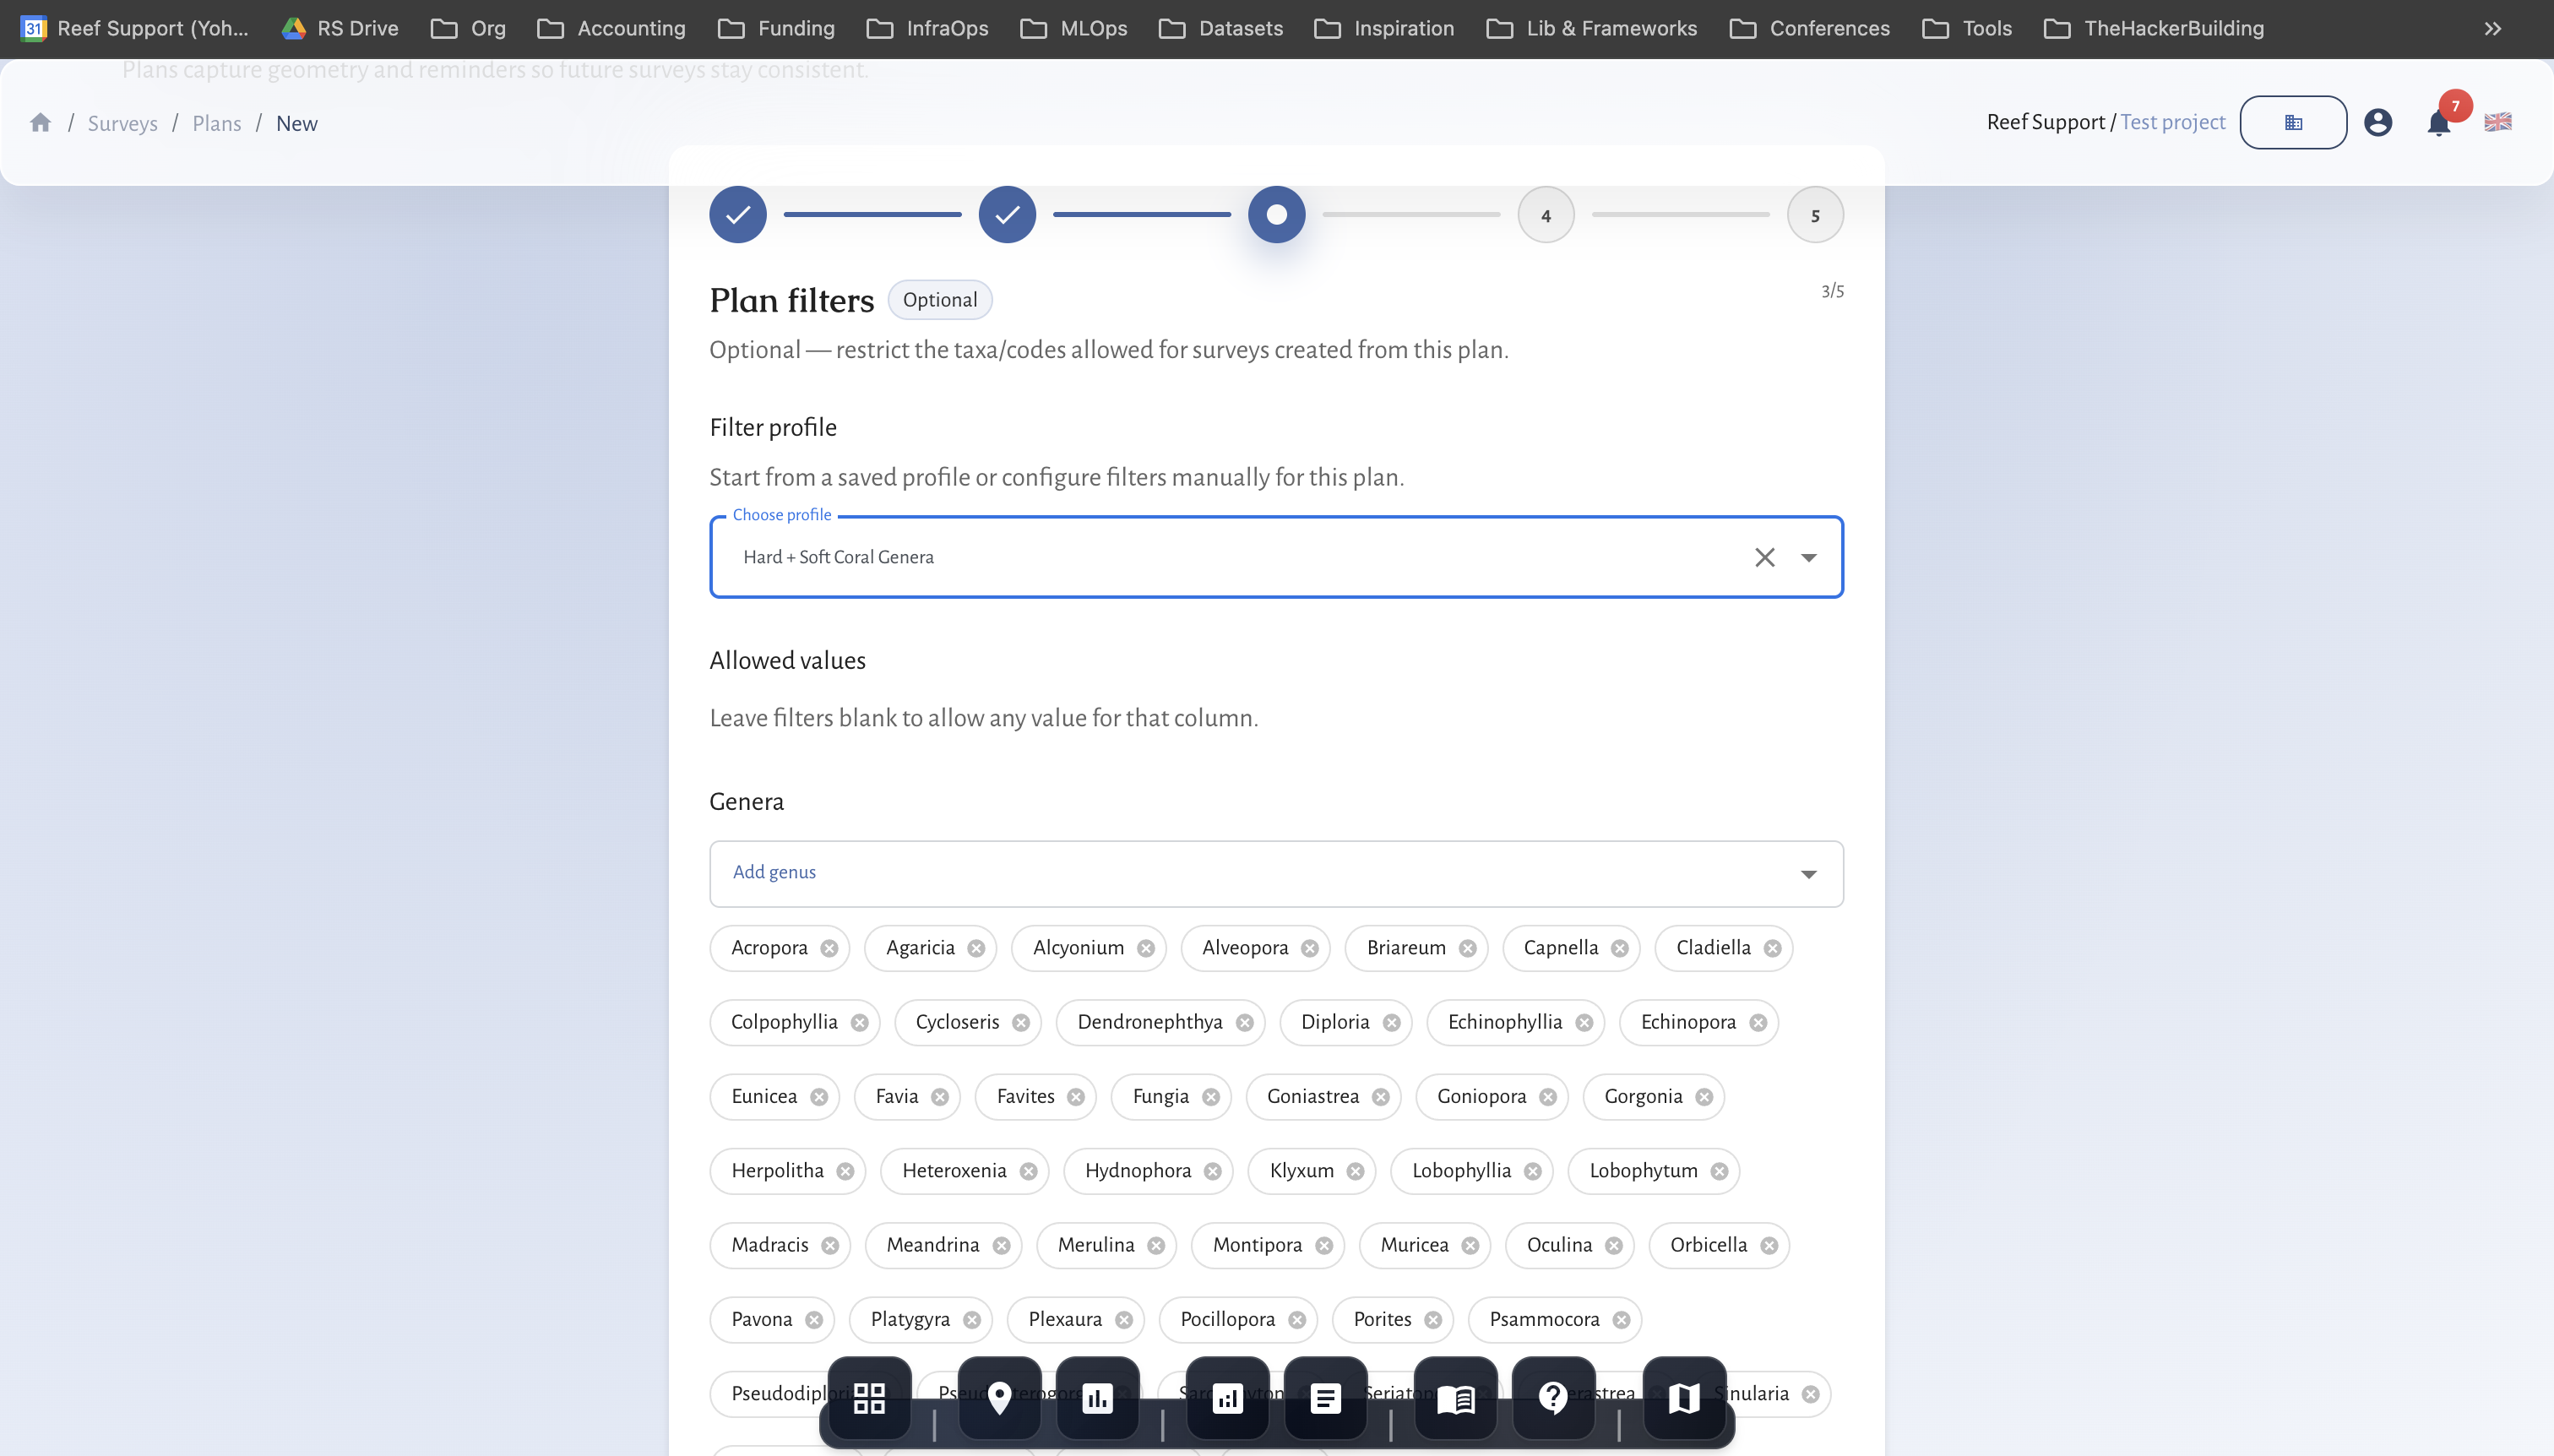
3) Plan filters
Optional but strongly recommended:
- Taxon filters constrain which taxa/codes appear during data entry.
- Taxon profiles let you reuse a consistent filter set across plans and sites.
4) Naming & recurrence
- Use a clear plan name (include protocol + site + year/season if helpful).
- Optionally set a recurrence schedule (RRULE-style behind the scenes) so the plan can surface “next due” monitoring.
5) Review
Confirm protocol, geometry, and filter logic before creating the plan.
Start and scope the plan
- Open
SurveysthenPlans. - Select
Create plan. - Choose project, site, and protocol.
Configure geometry and filters
- Add or select plan geometry.
- Configure taxa and parameter filters.
- Save with clear naming convention.
Geometry guidance by protocol (practical defaults)
- Benthic / fish / invertebrate transects: use multiple short transect lines. Keep transect length consistent across repeats.
- Tree growth: use AOI polygons or transects that capture your mangrove stand structure.
- Fauna observation: use AOI polygons to bound observations and reduce spatial ambiguity.
- Benthic images: use quadrats, transects, or photopoints; keep a stable photopoint set if you are building time series.
Plan governance
- One plan per stable protocol and site pattern
- Explicit version updates when method changes
- Keep deprecated plans archived, not deleted
- Prefer “Create survey from plan” so geometry reuse is automatic
- If you change geometry materially, create a new plan (don’t overwrite history)