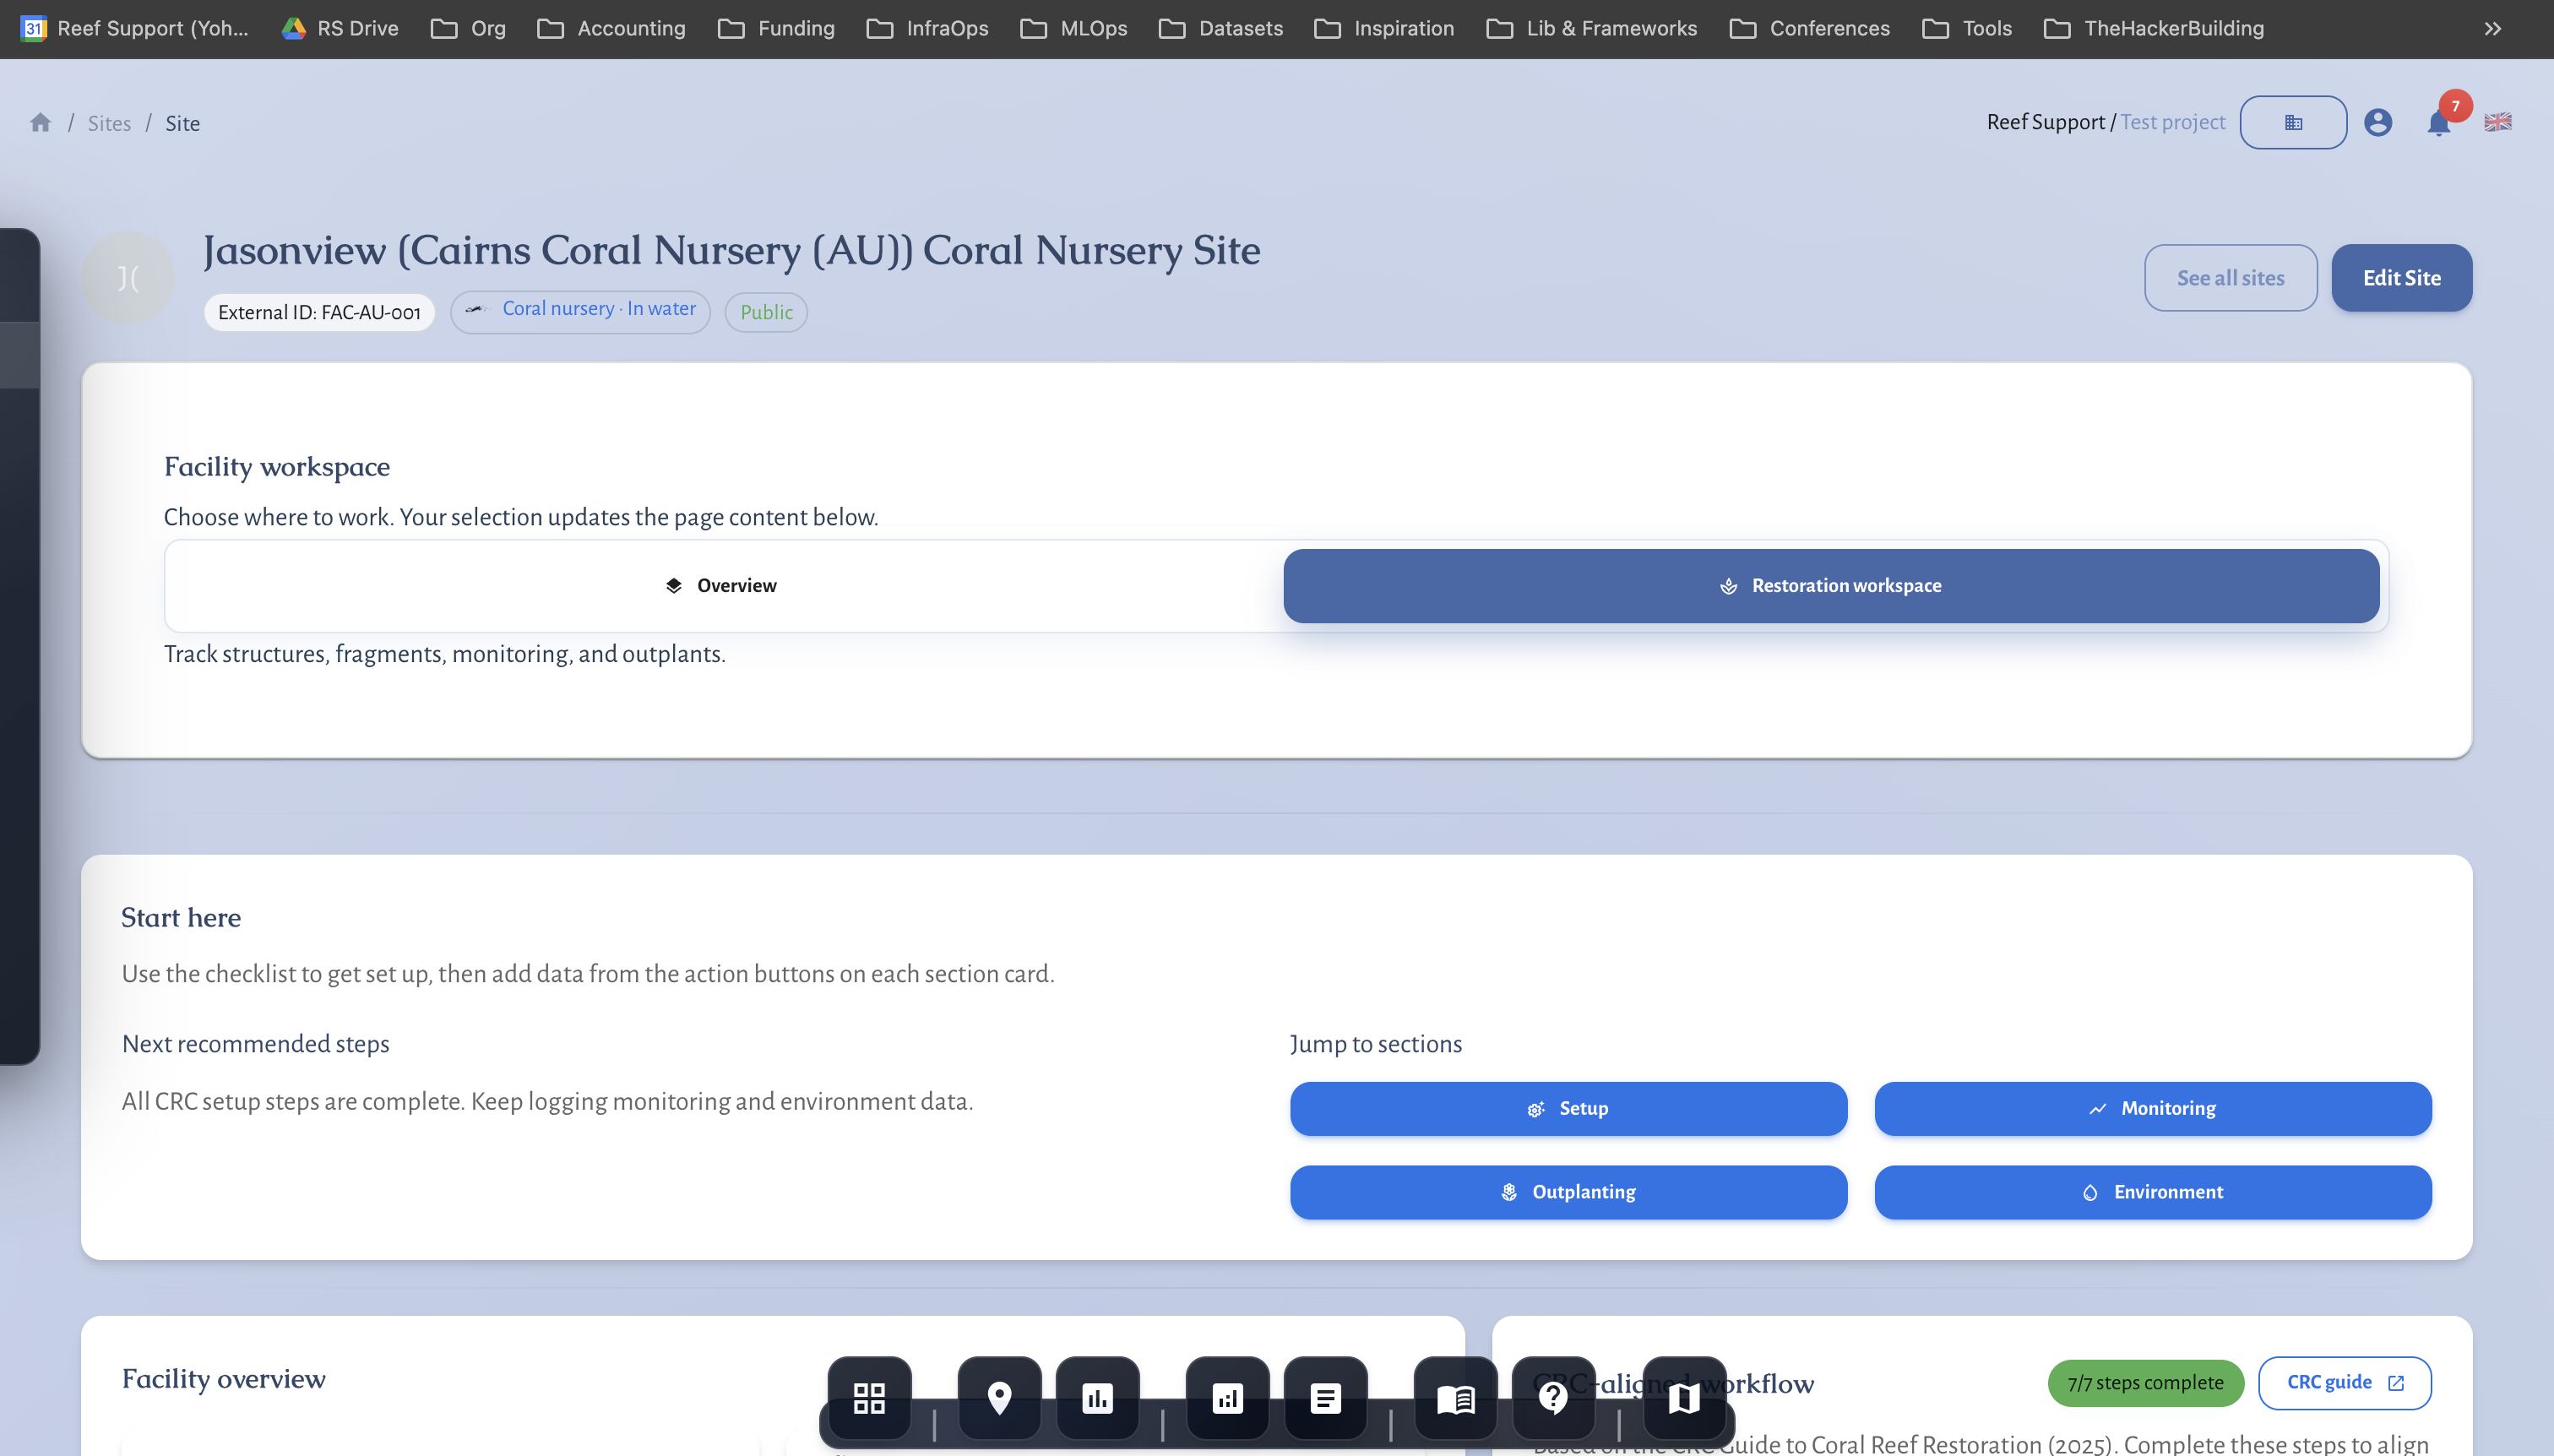
Restoration Workspace
The restoration workspace supports facility operations that are not handled by standard survey-only flows.
Use the restoration workspace when you need traceability for:
- Structures (tables, ropes, frames, nurseries)
- Fragments / colonies (IDs, genotype references, status changes)
- Monitoring over time (growth, bleaching, disease, partial mortality, predation)
- Transfers and outplanting (where did fragments go, when, and under what method)
Facility setup
- Create site as restoration facility.
- Open restoration workspace for that site.
- Add structures and genotype references (if used).
Facility geometry (point vs boundary)
- Use a point when the facility is best represented as a location (for example: a lab building).
- Use a boundary when spatial layout matters (for example: an in-water nursery footprint).
Keep geometry stable so monitoring and reporting stay consistent.
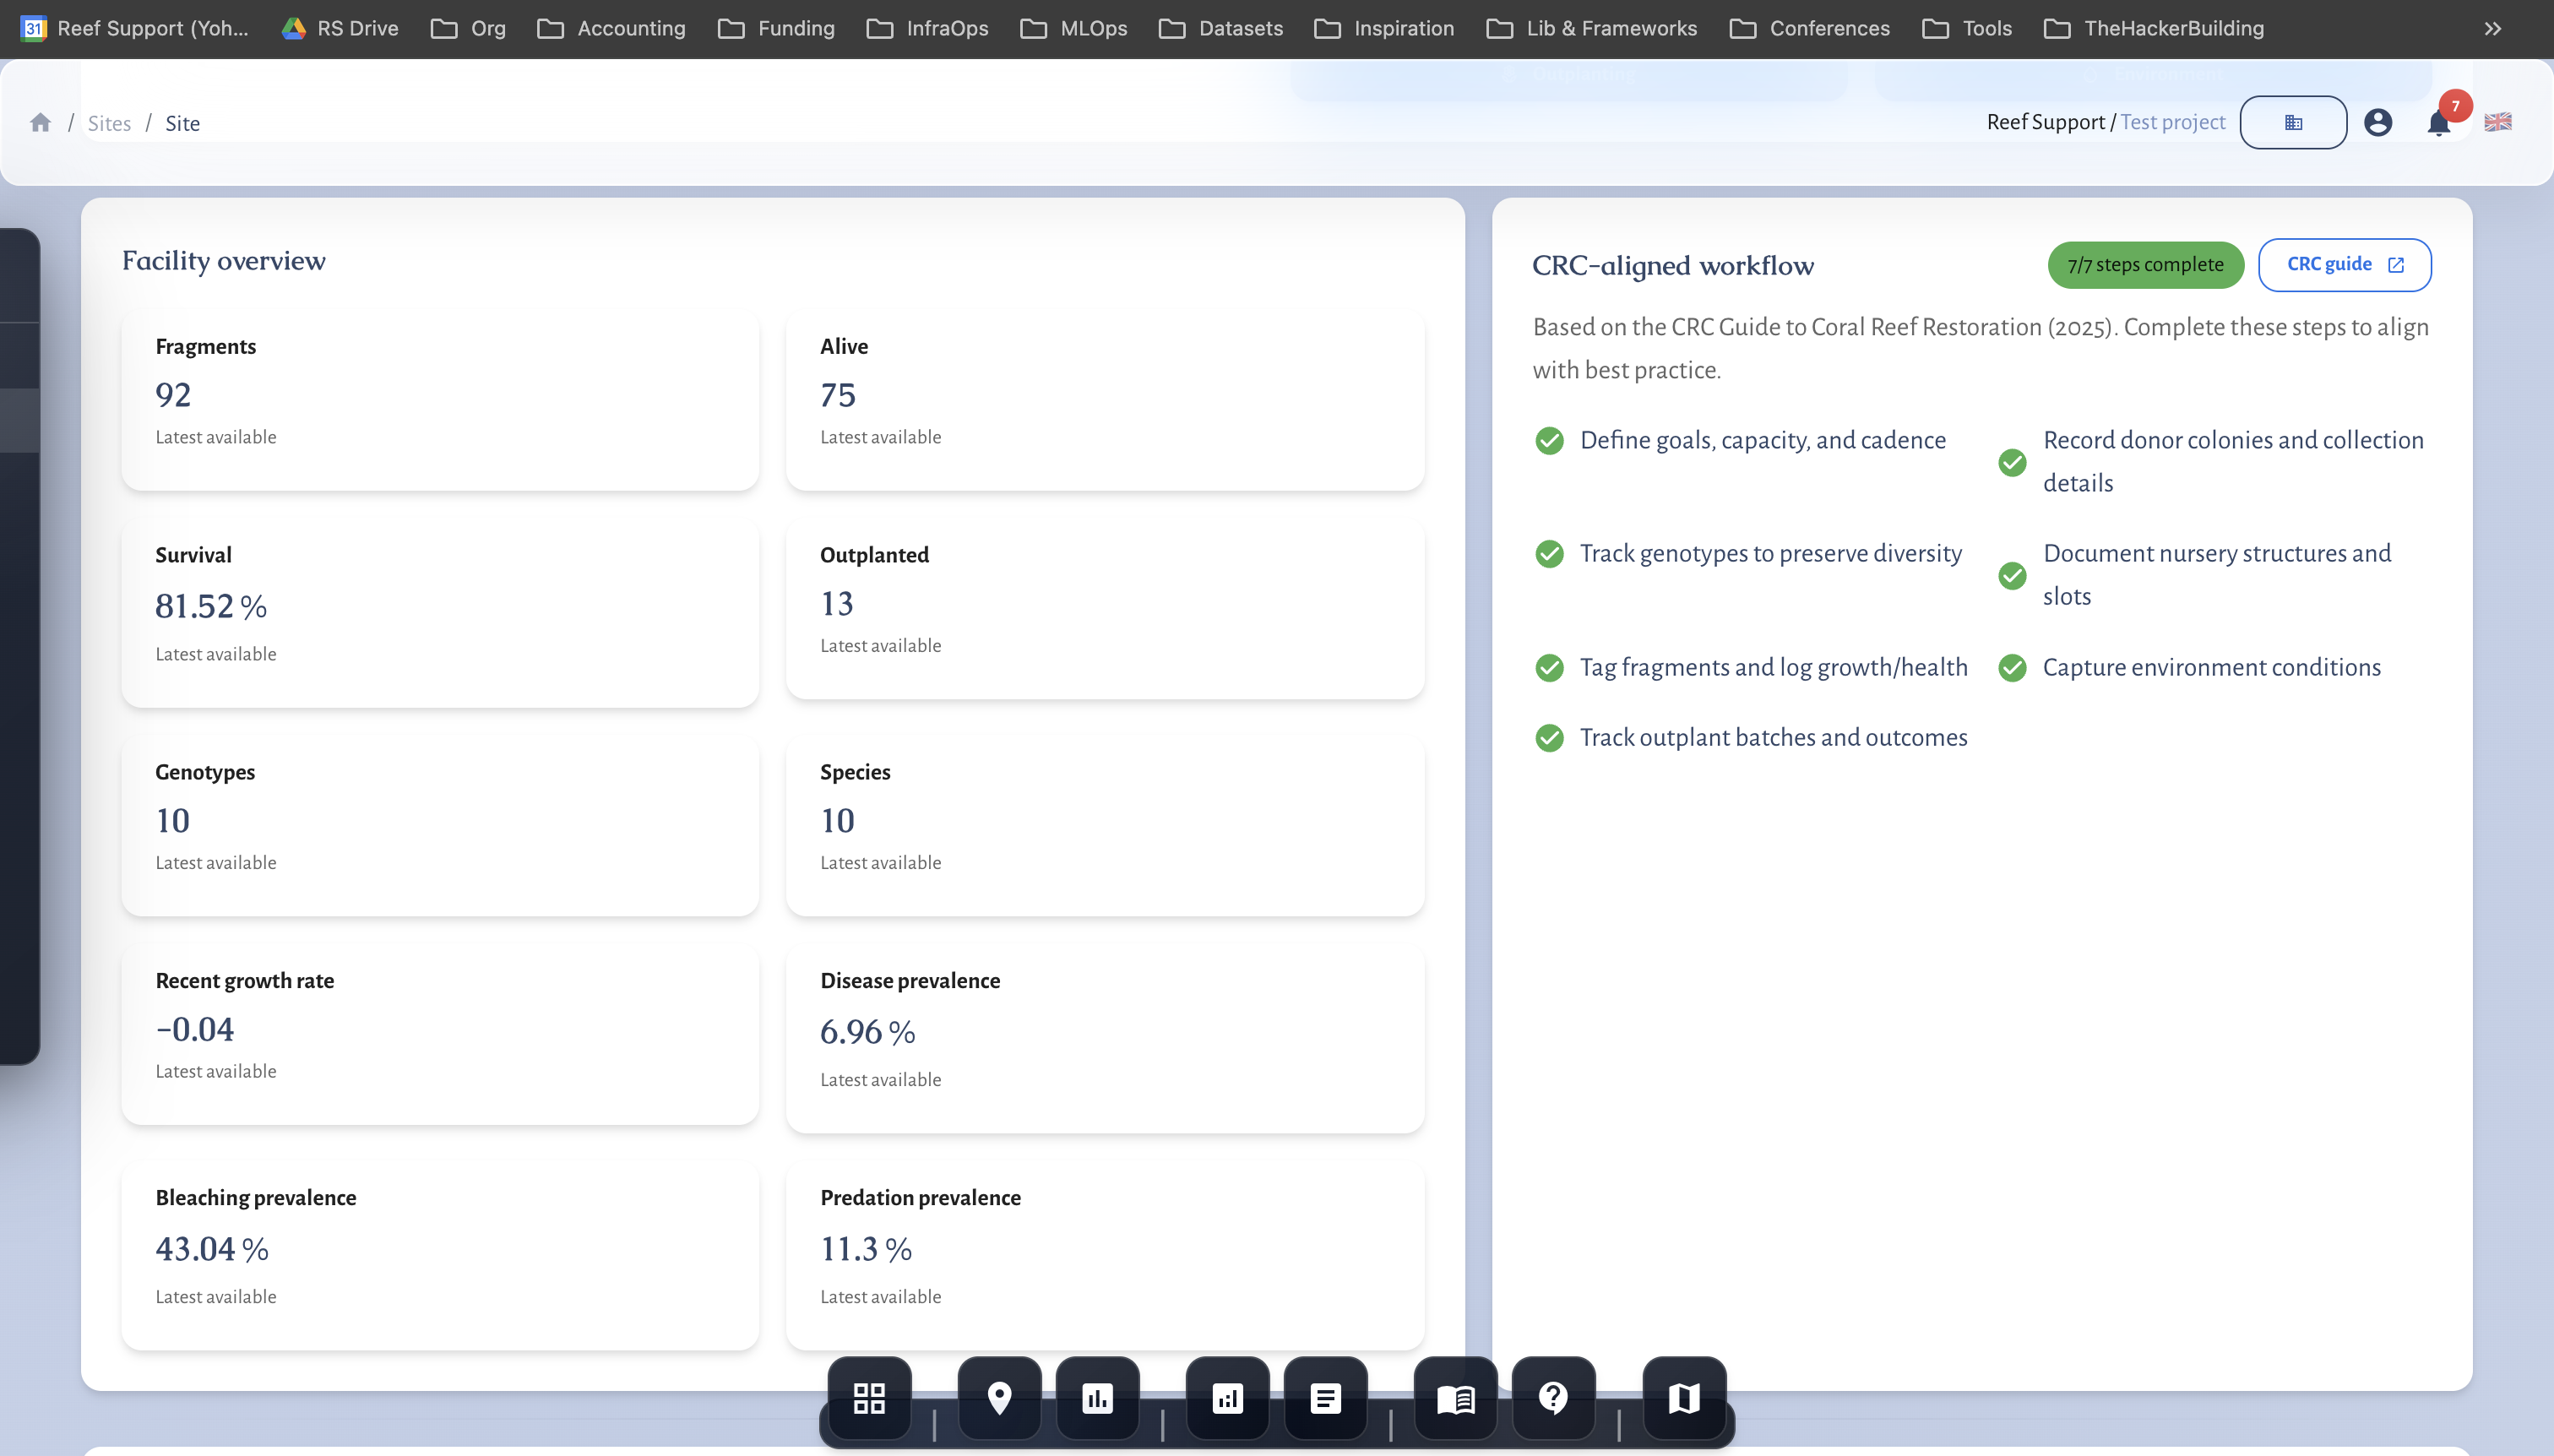
Fragment operations
- Register fragments under structures.
- Record growth and health updates.
- Maintain transfer and outplant traceability.
Fragment IDs and status
Recommended practice:
- Treat fragment IDs as permanent identifiers.
- Track status changes explicitly (alive, outplanted, dead, lost, merged, archived).
- Avoid “renaming” fragments to fix mistakes; instead, add notes and use status/history.
Monitoring cadence
Keep cadence consistent (for example monthly or quarterly) so changes are interpretable:
- Growth measurements: size, DBH/height-like measures, or protocol-specific size values
- Health measurements: bleaching, disease, partial mortality, predation presence
- Survival and performance rollups feed into analytics and reporting
Suggested controls
- Keep fragment IDs stable
- Use regular monitoring cadence
- Audit outplant linkage before reporting
- Keep “inputs vs outcomes” disciplined in notes and claims language
- Use Metrics reference for consistent metric interpretation