Setting Up Your First Project and Site
Projects in MariMap organize your conservation work and give your team a shared structure for marine monitoring. Each project contains sites, which are the real locations where you collect surveys, photos, and field notes. This guide walks through the exact project and site wizards in MariMap so your data stays organized from day one.
 Navigate from projects to sites and surveys in MariMap.
At a glance
- Projects define scope and reporting; sites define locations and boundaries.
- The project wizard covers Project details, Focus & reporting, Funding, and Review.
- The site wizard covers Site category, Site type, Water context, Site information, Site area, Site metadata, and Review.
- Site boundaries power maps, analytics, and survey geometry.
- Consistent names and IDs make marine conservation reporting easier.
Before you start
- Select the right organization in the top bar.
- Decide the project focus and reporting audience.
- Gather boundaries or coordinates (GeoJSON/KML or coordinate pairs).
- Align on naming conventions for projects and sites.
Step-by-step in MariMap
1) Open the project list
- Open the project selector in the top bar.
- Click Manage Projects to open the Projects page.
- Confirm the organization displayed matches your team.
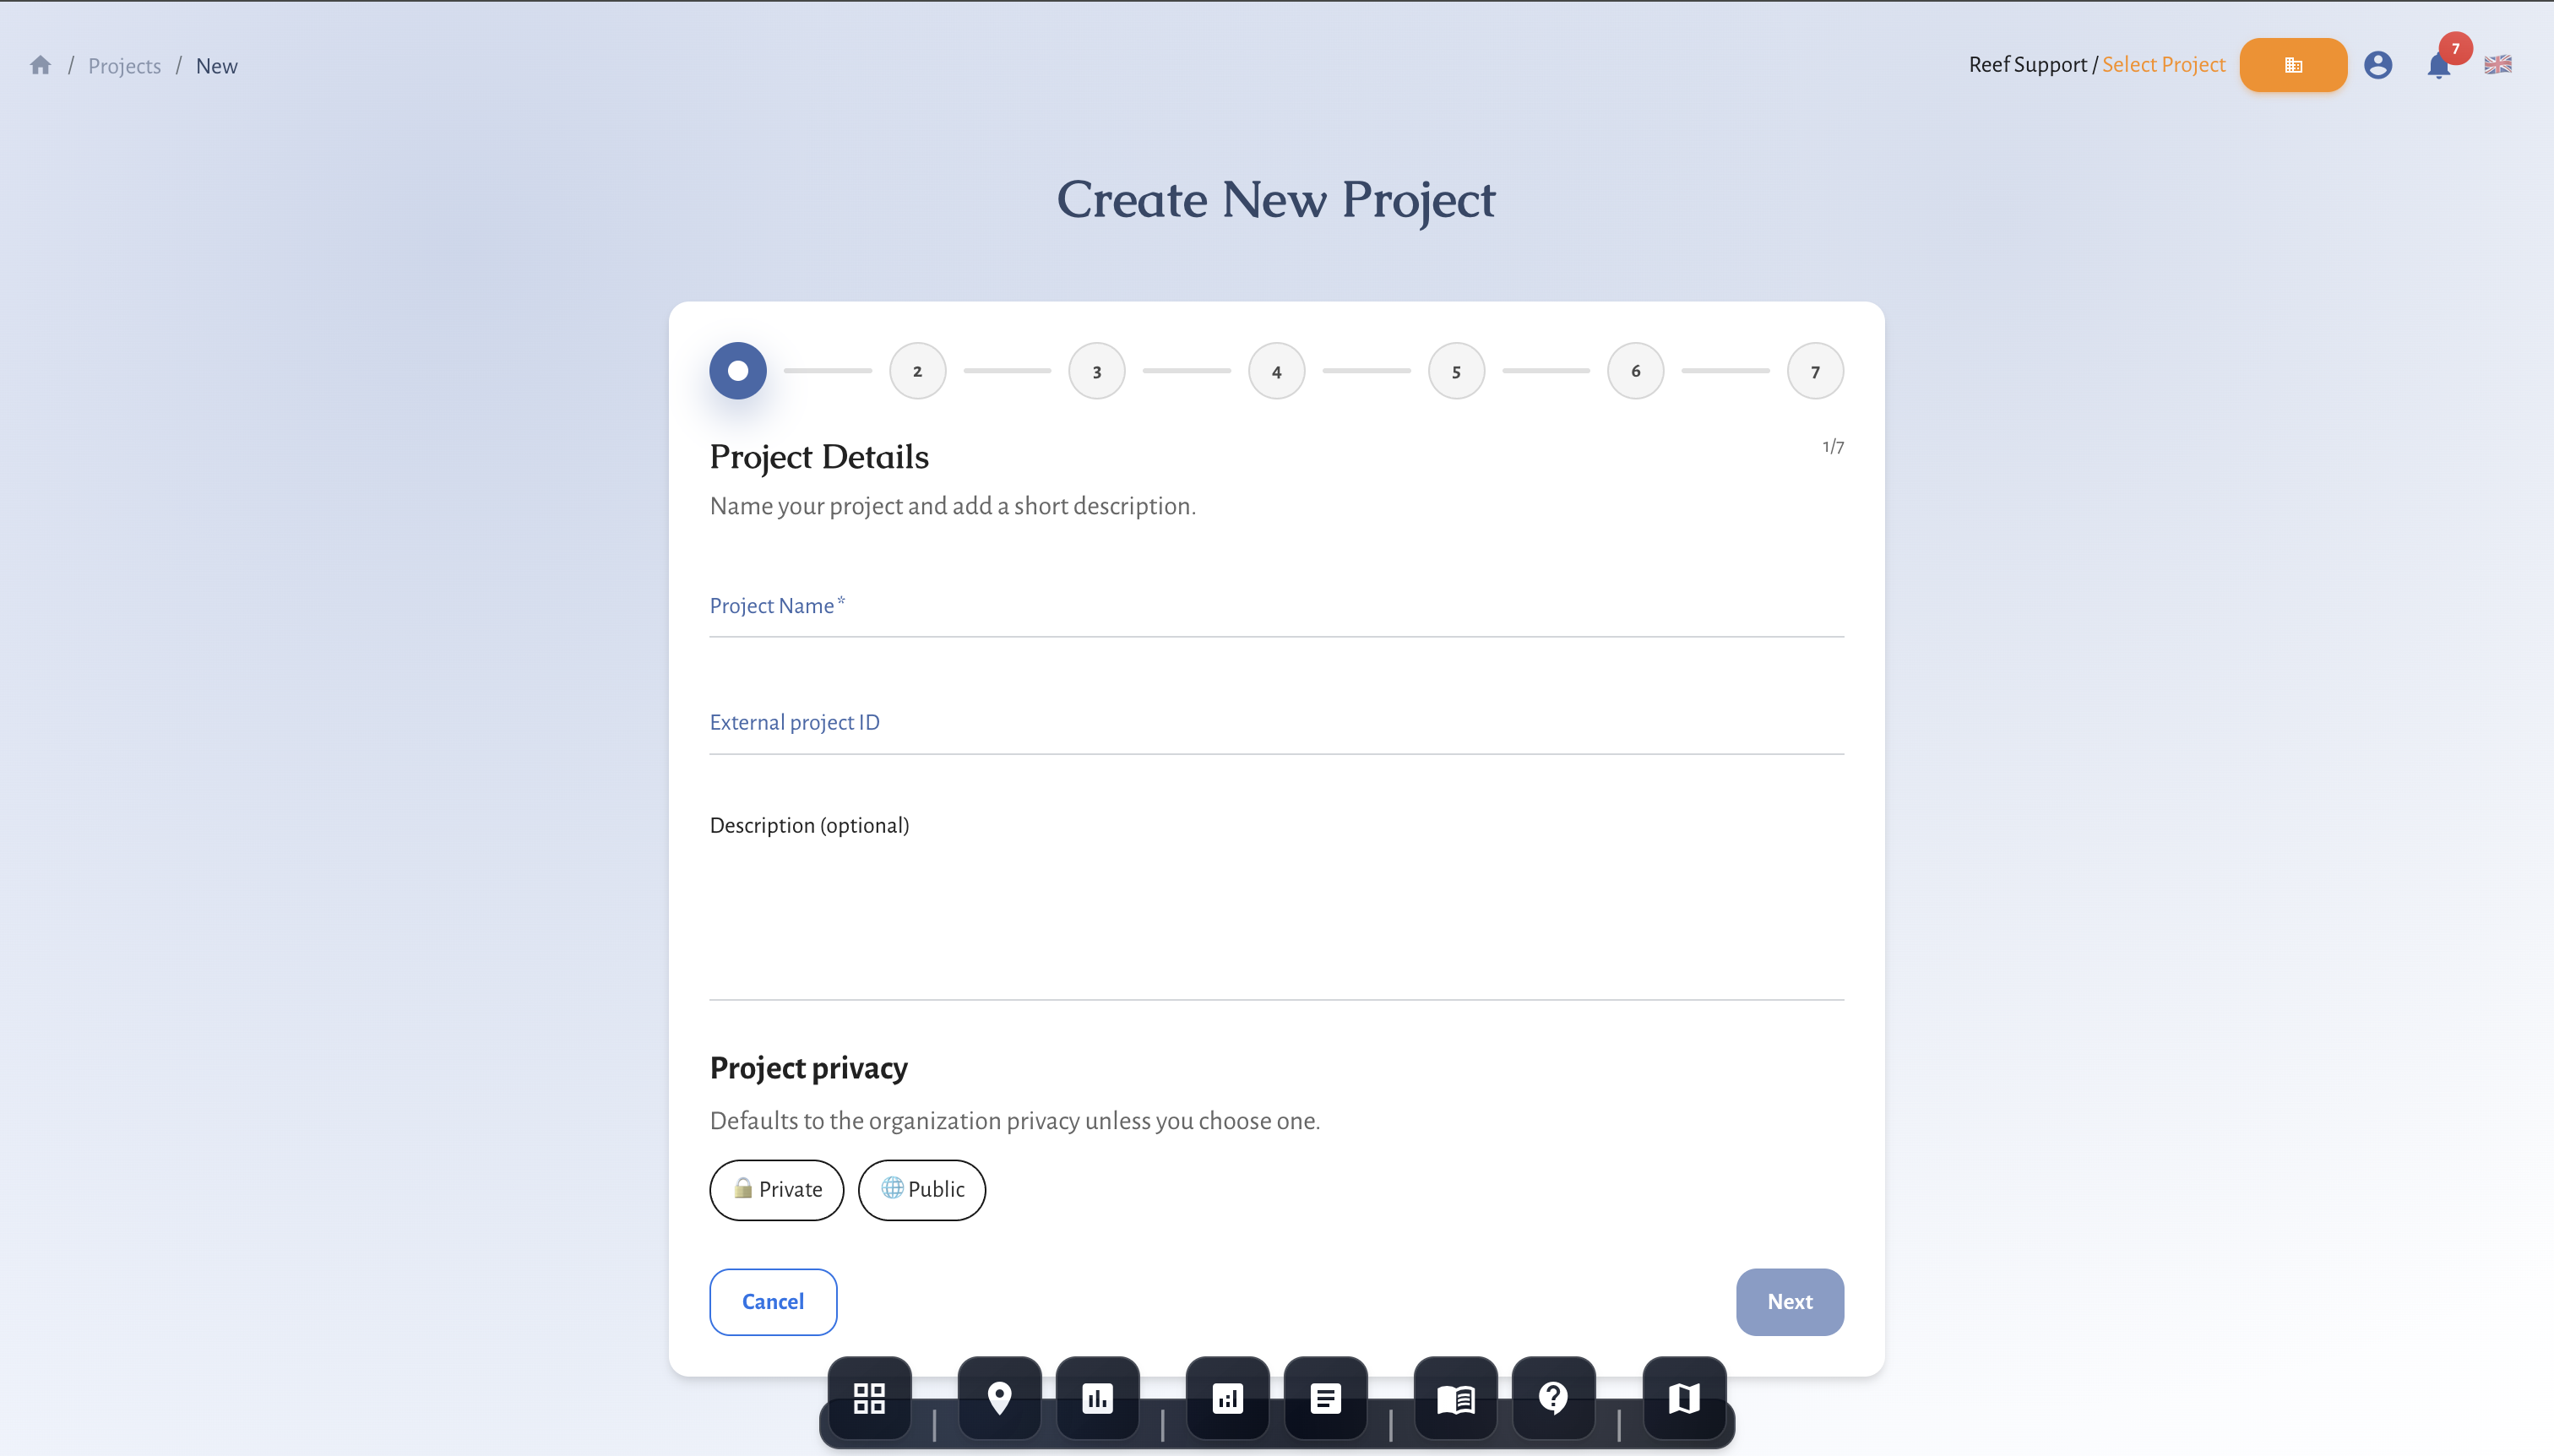
2) Create the project
- Click Create project.
- Follow the wizard:
- Project details: name, optional description, and project privacy.
- Focus & reporting: select the project goal and reporting audience.
- Funding (optional): add funding type and primary funders.
- Review: confirm and click Create project.
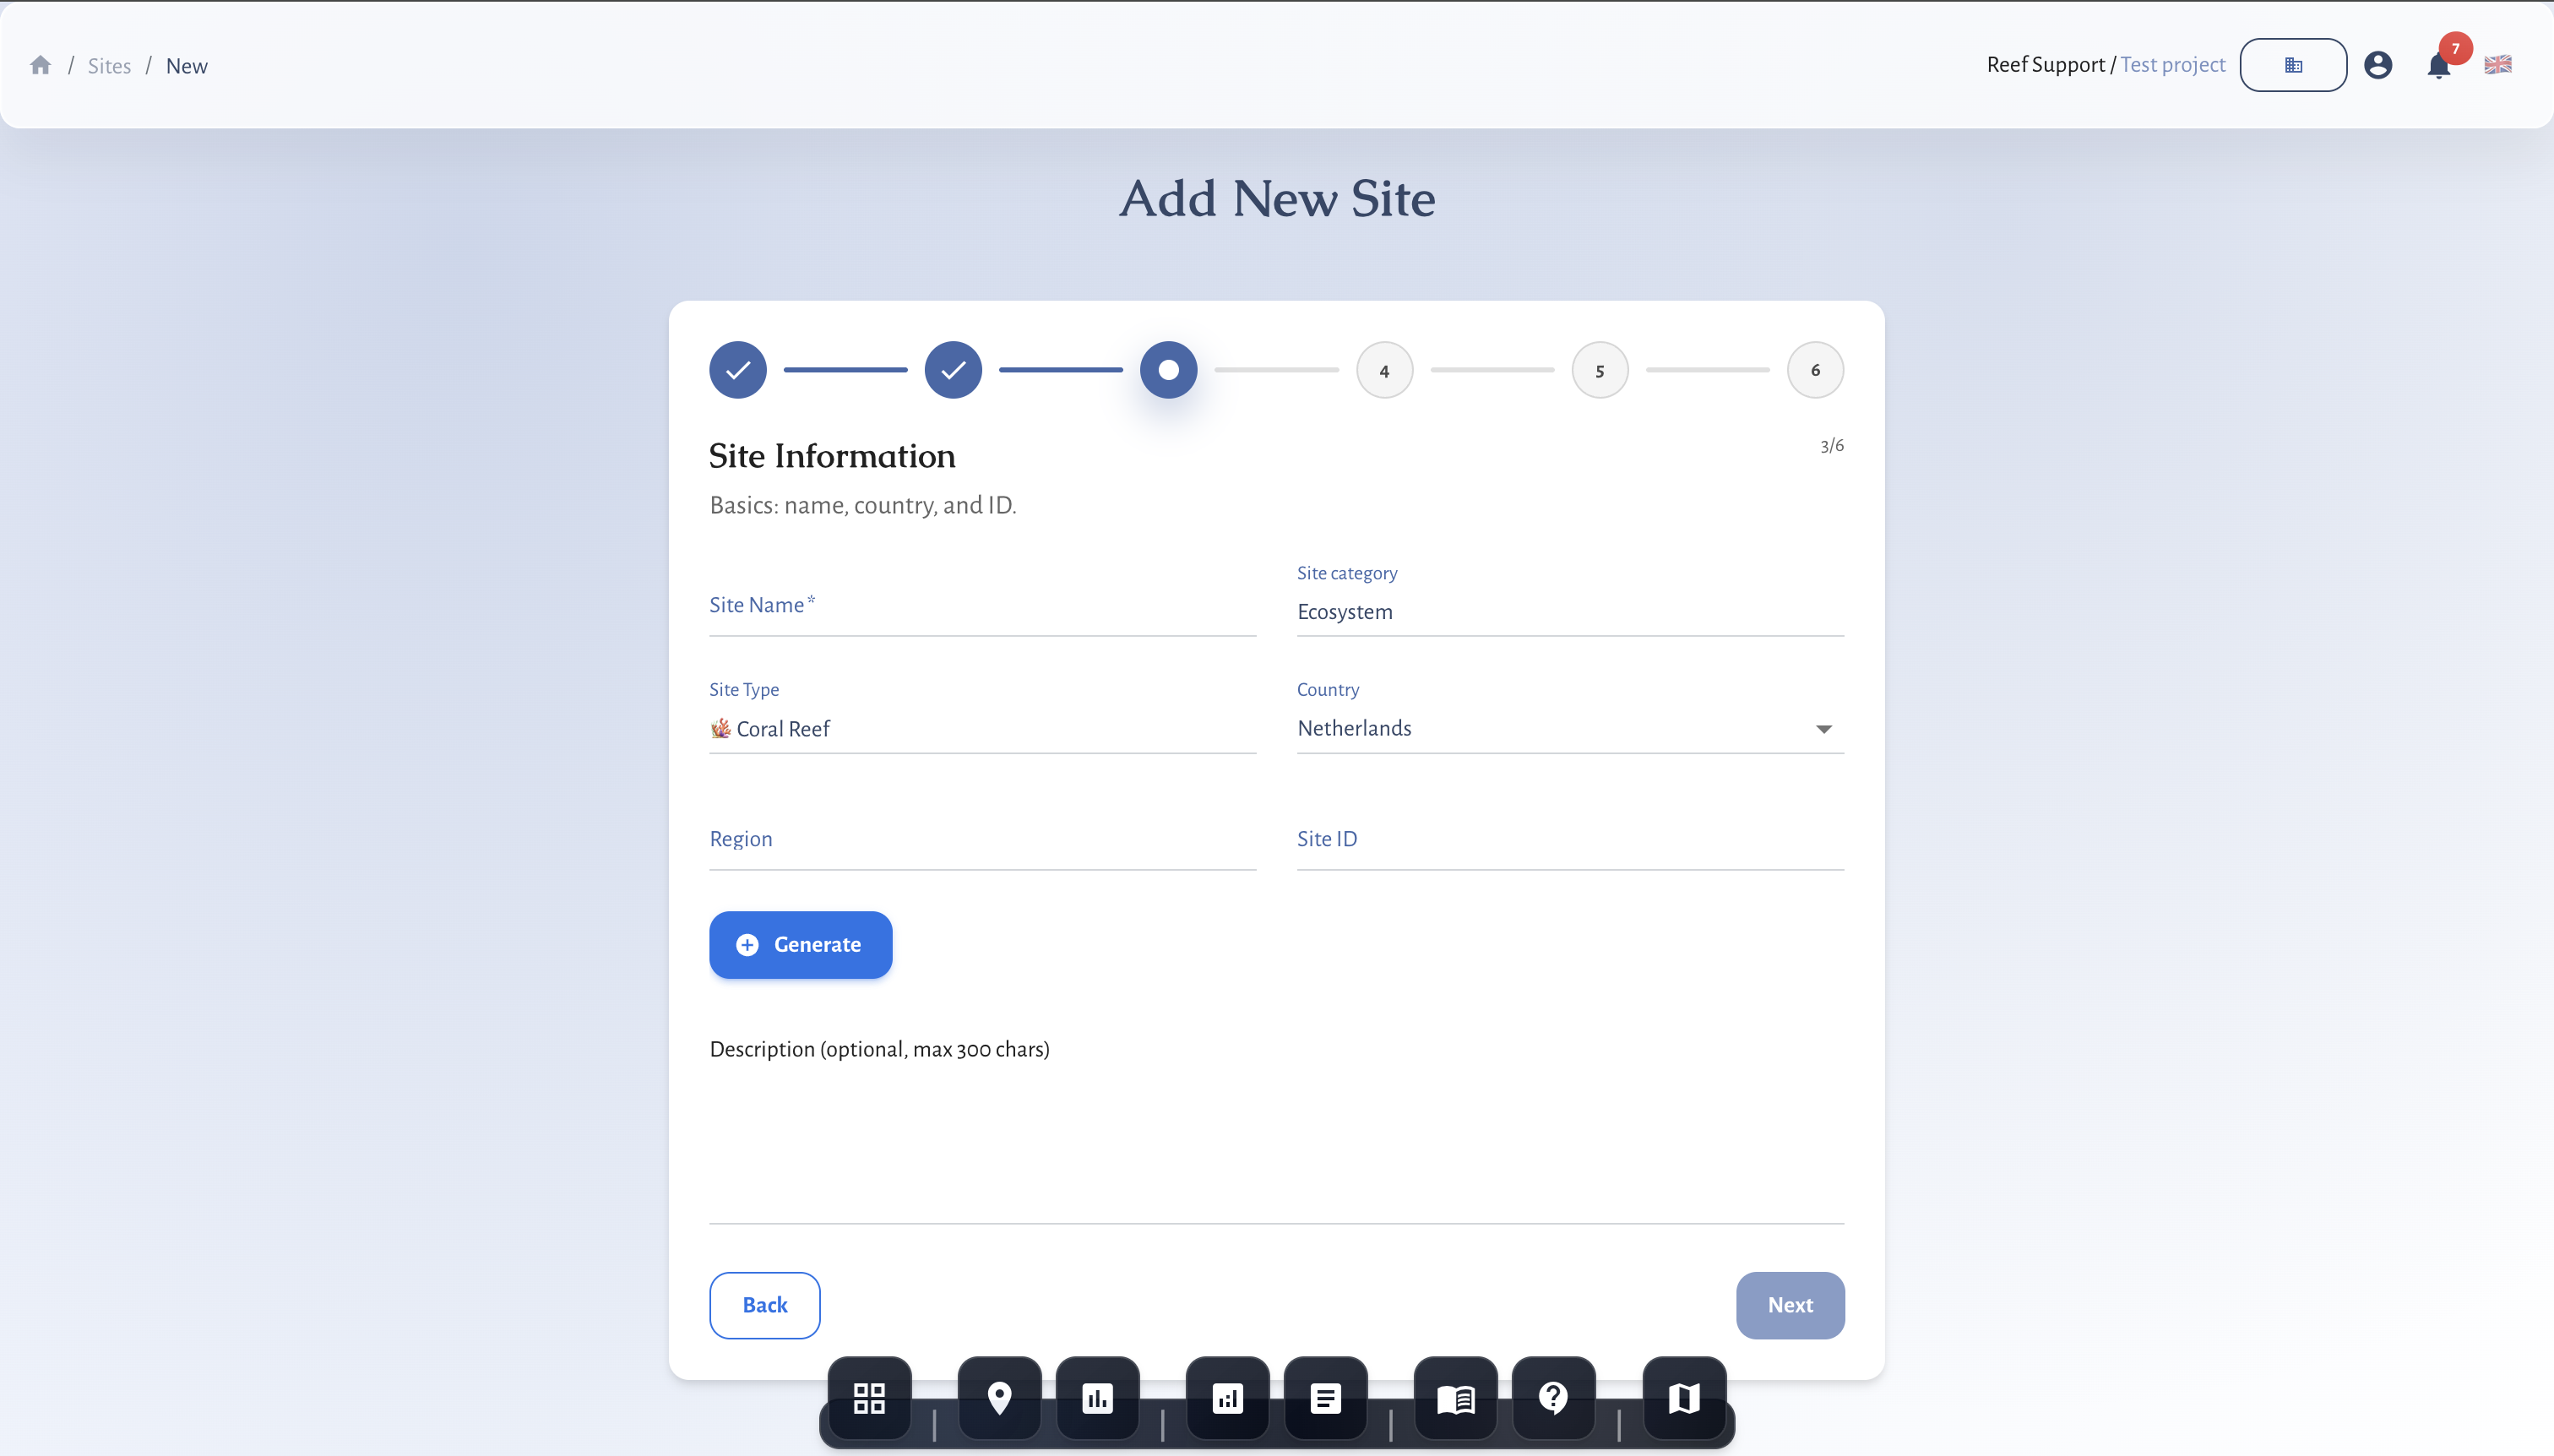
3) Add your first site
- Go to Sites in the left navigation.
- Click Create site.
- Follow the site wizard:
- Site category: choose Ecosystem or Restoration facility.
- Site type: select Coral reef, Seagrass, Mangrove, or a facility type (Coral nursery or Coral lab).
- Water context (facilities): pick In water or On land.
- Site information: name, country, optional ID, and description. Use Generate for a consistent Site ID.
- Site area: draw a polygon, upload GeoJSON/KML, or paste coordinates.
- Site metadata (optional): protection level, tenure, and privacy.
- Review: confirm and click Create site.
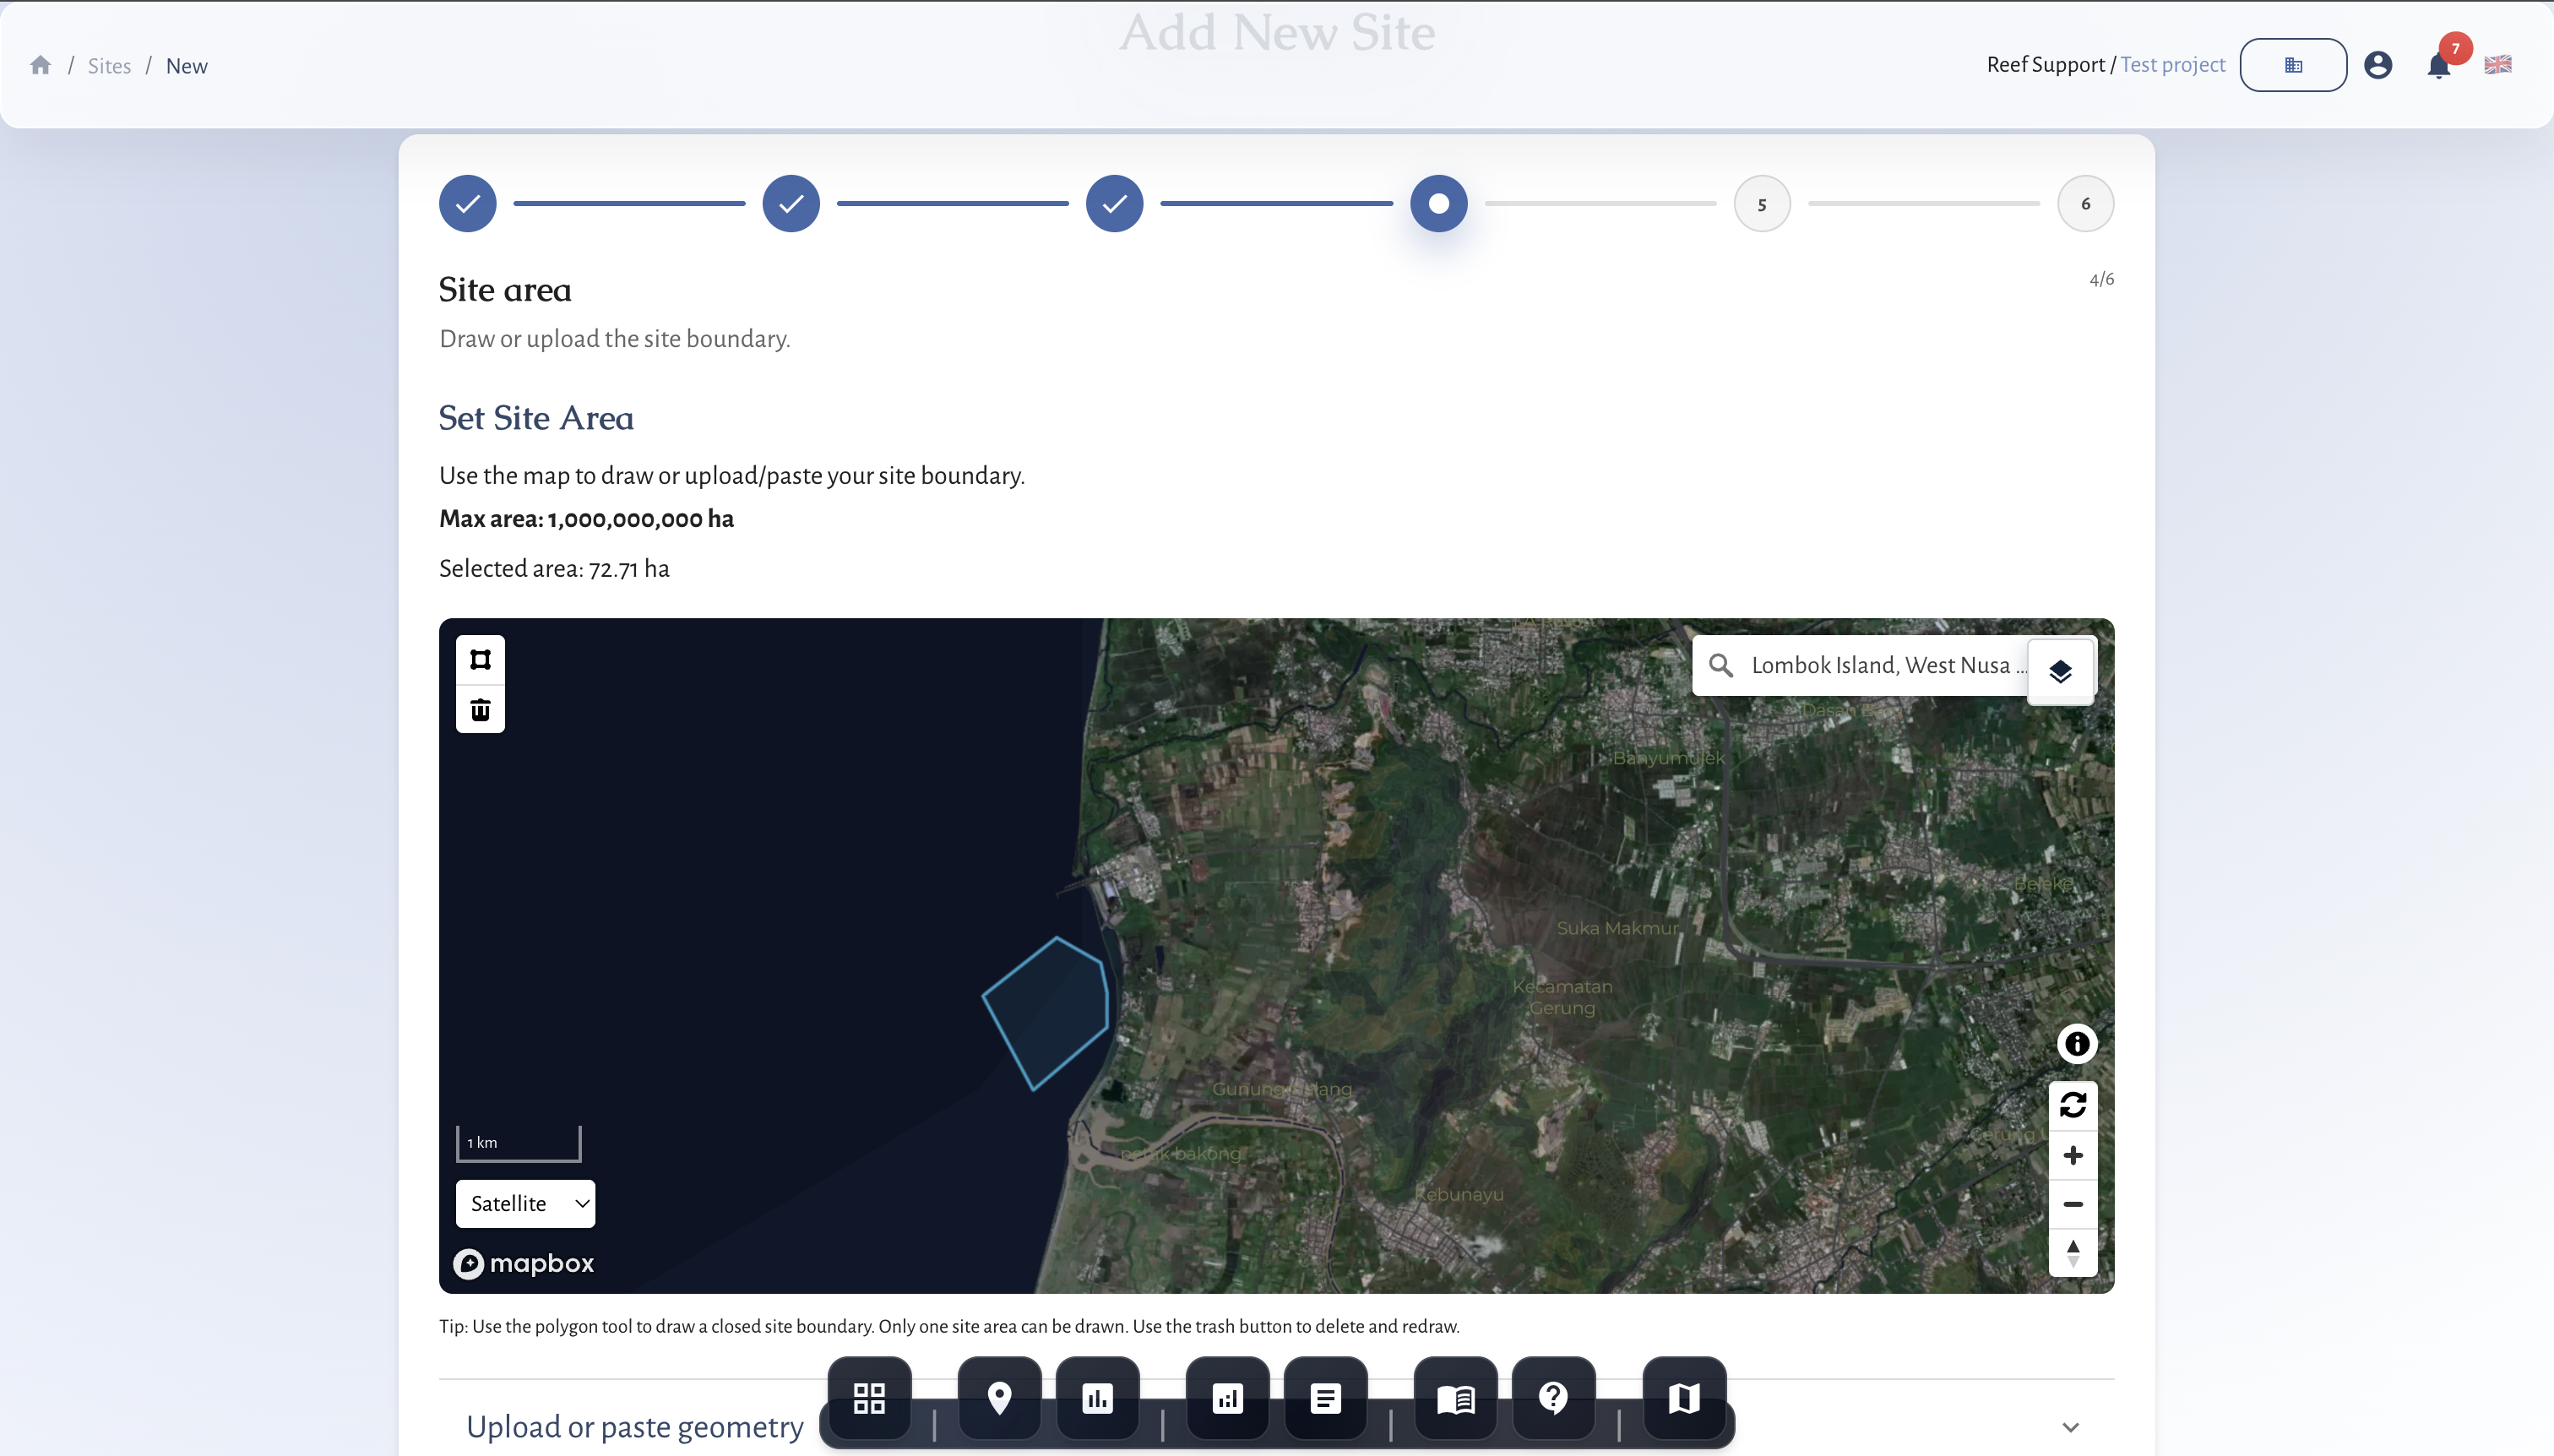 Add a site and map the boundary to align surveys.
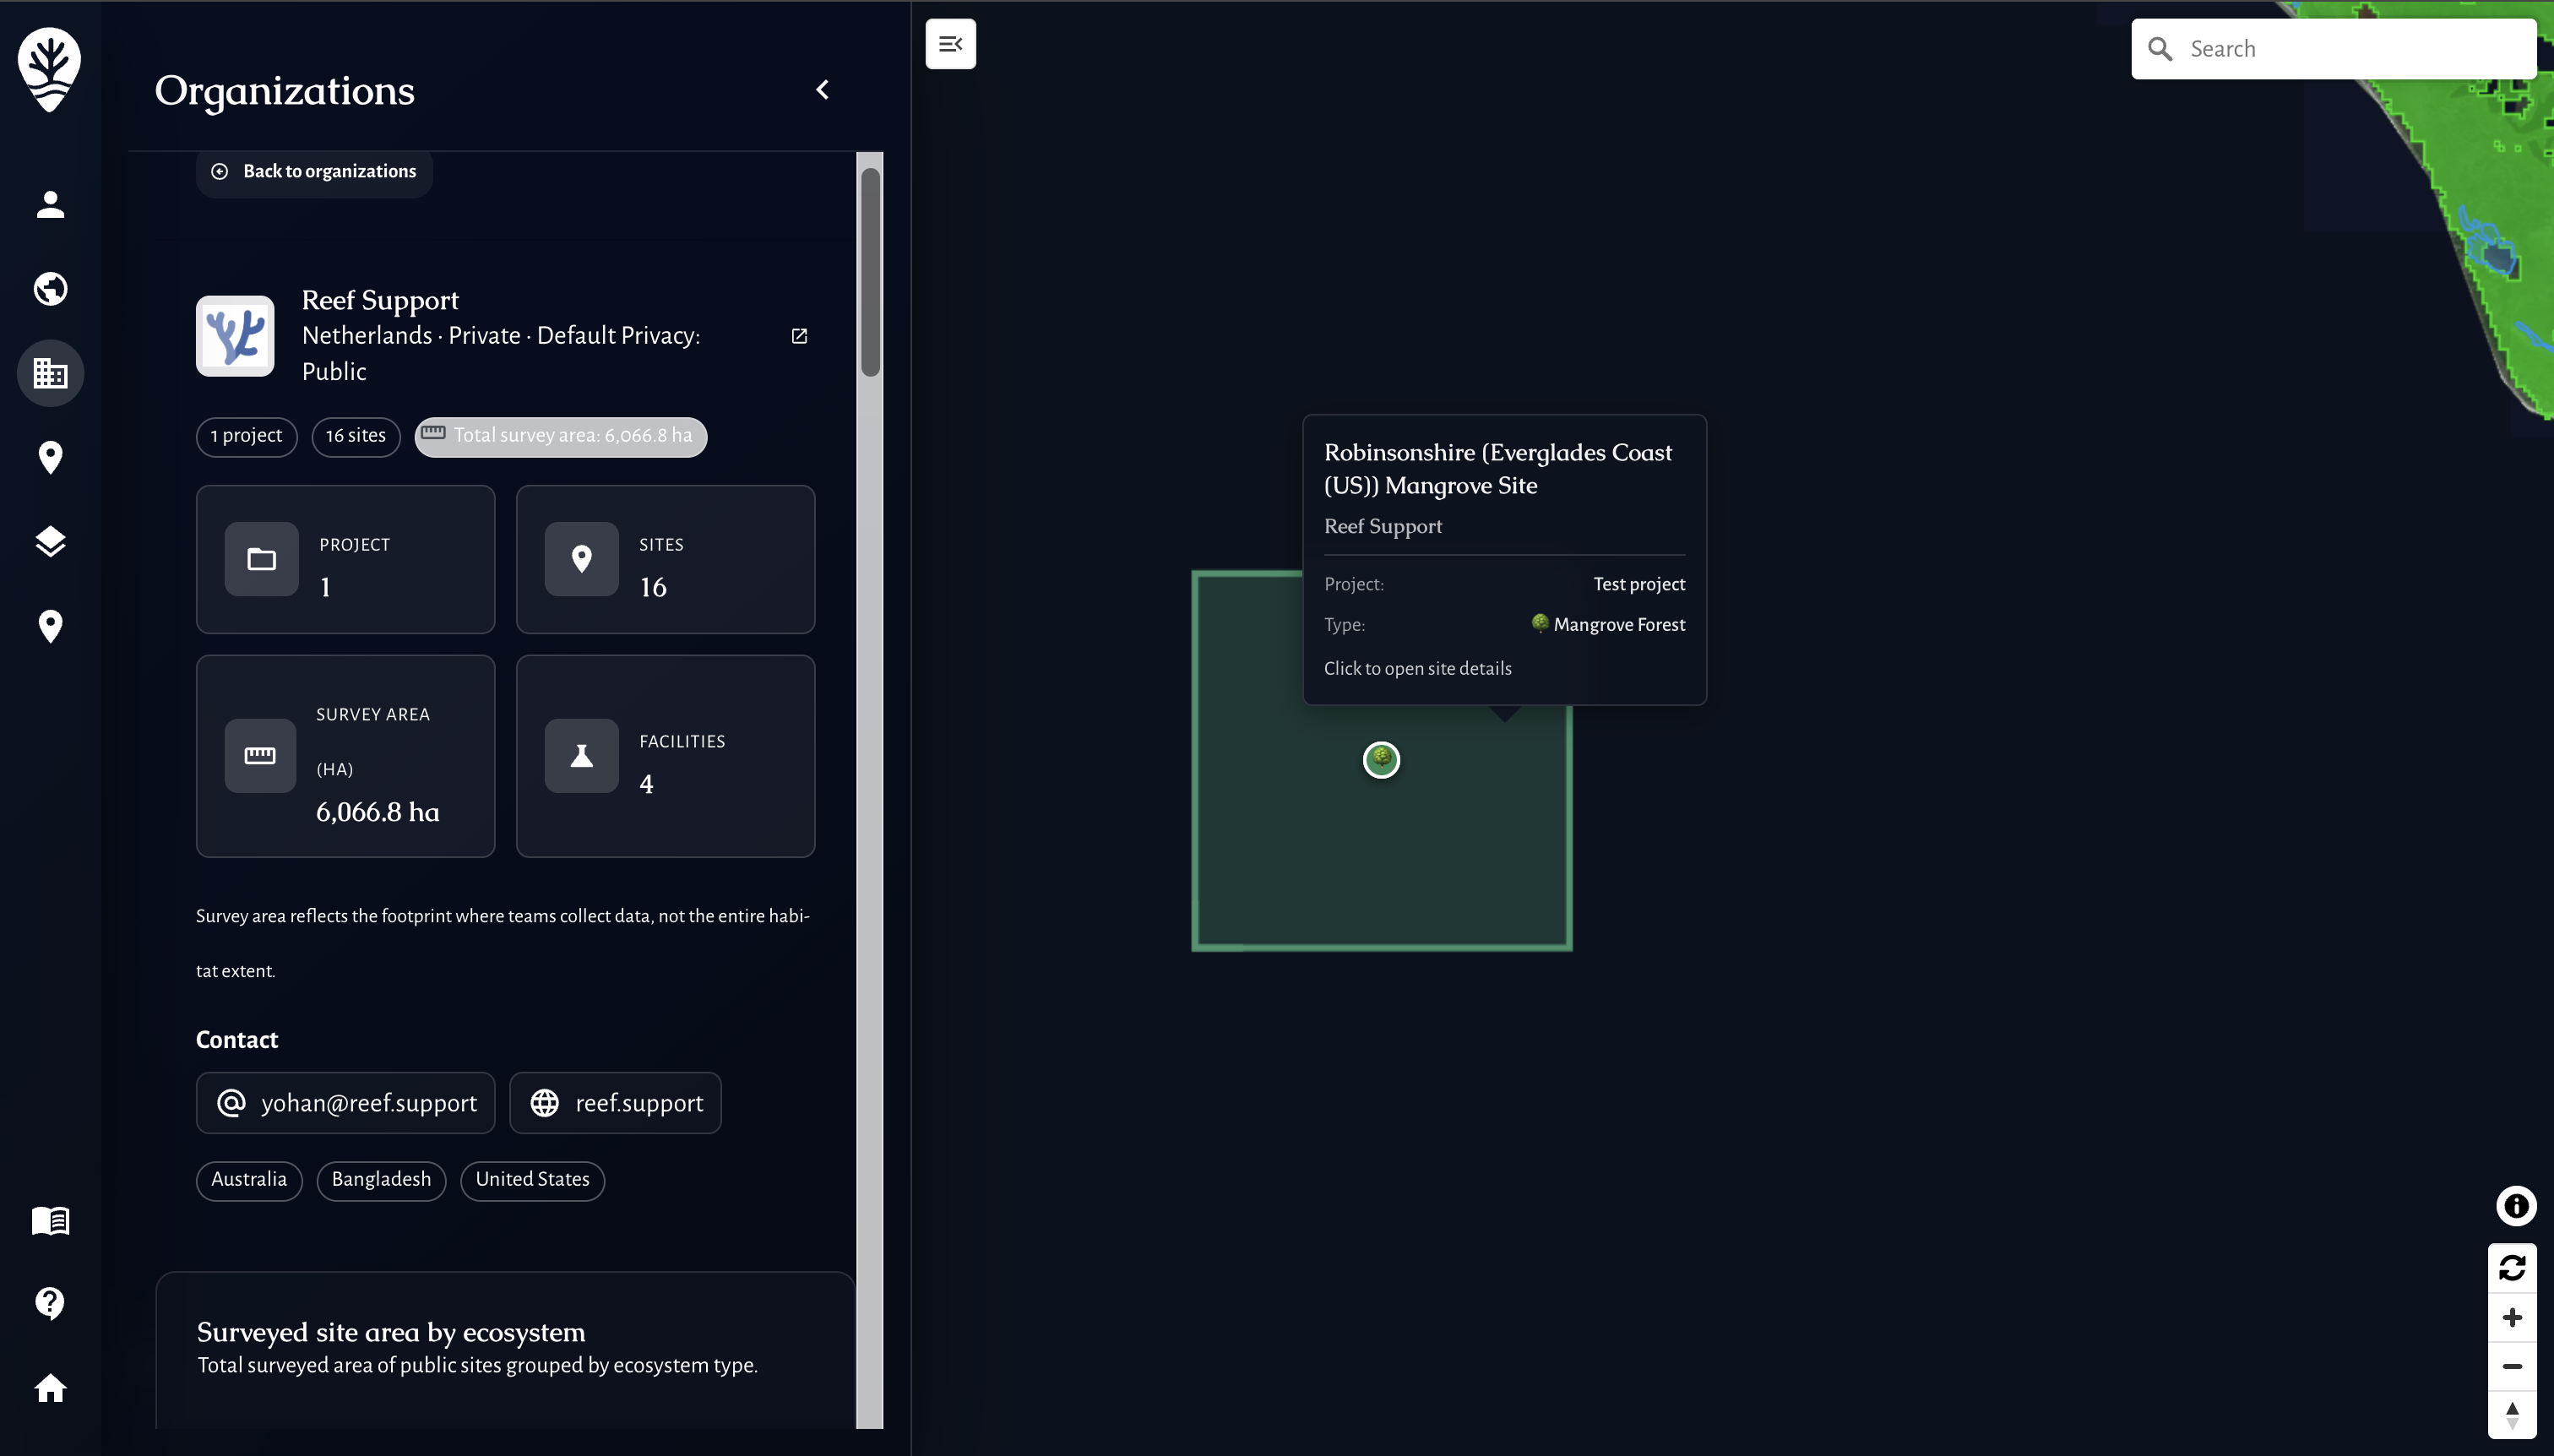
4) Review the project dashboard
- Open the project from Projects.
- Check Project summary, Sites, and the Project timeline.
- Open the site to confirm the boundary on the map.
Organizing project structure
- Use clear names that reflect location and year (for example: “Bonaire Coral Restoration 2026”).
- Keep boundaries tight to the monitoring footprint, not the full bay.
- Use Site IDs to link external datasets or field sheets.
- Choose the correct site type to unlock the right protocols later.
Tips for clean GIS setup
- Upload GeoJSON or KML if you already have GIS boundaries.
- If your organization is private, project privacy is locked to Private.
- Facilities can be points; ecosystem sites should be polygons.
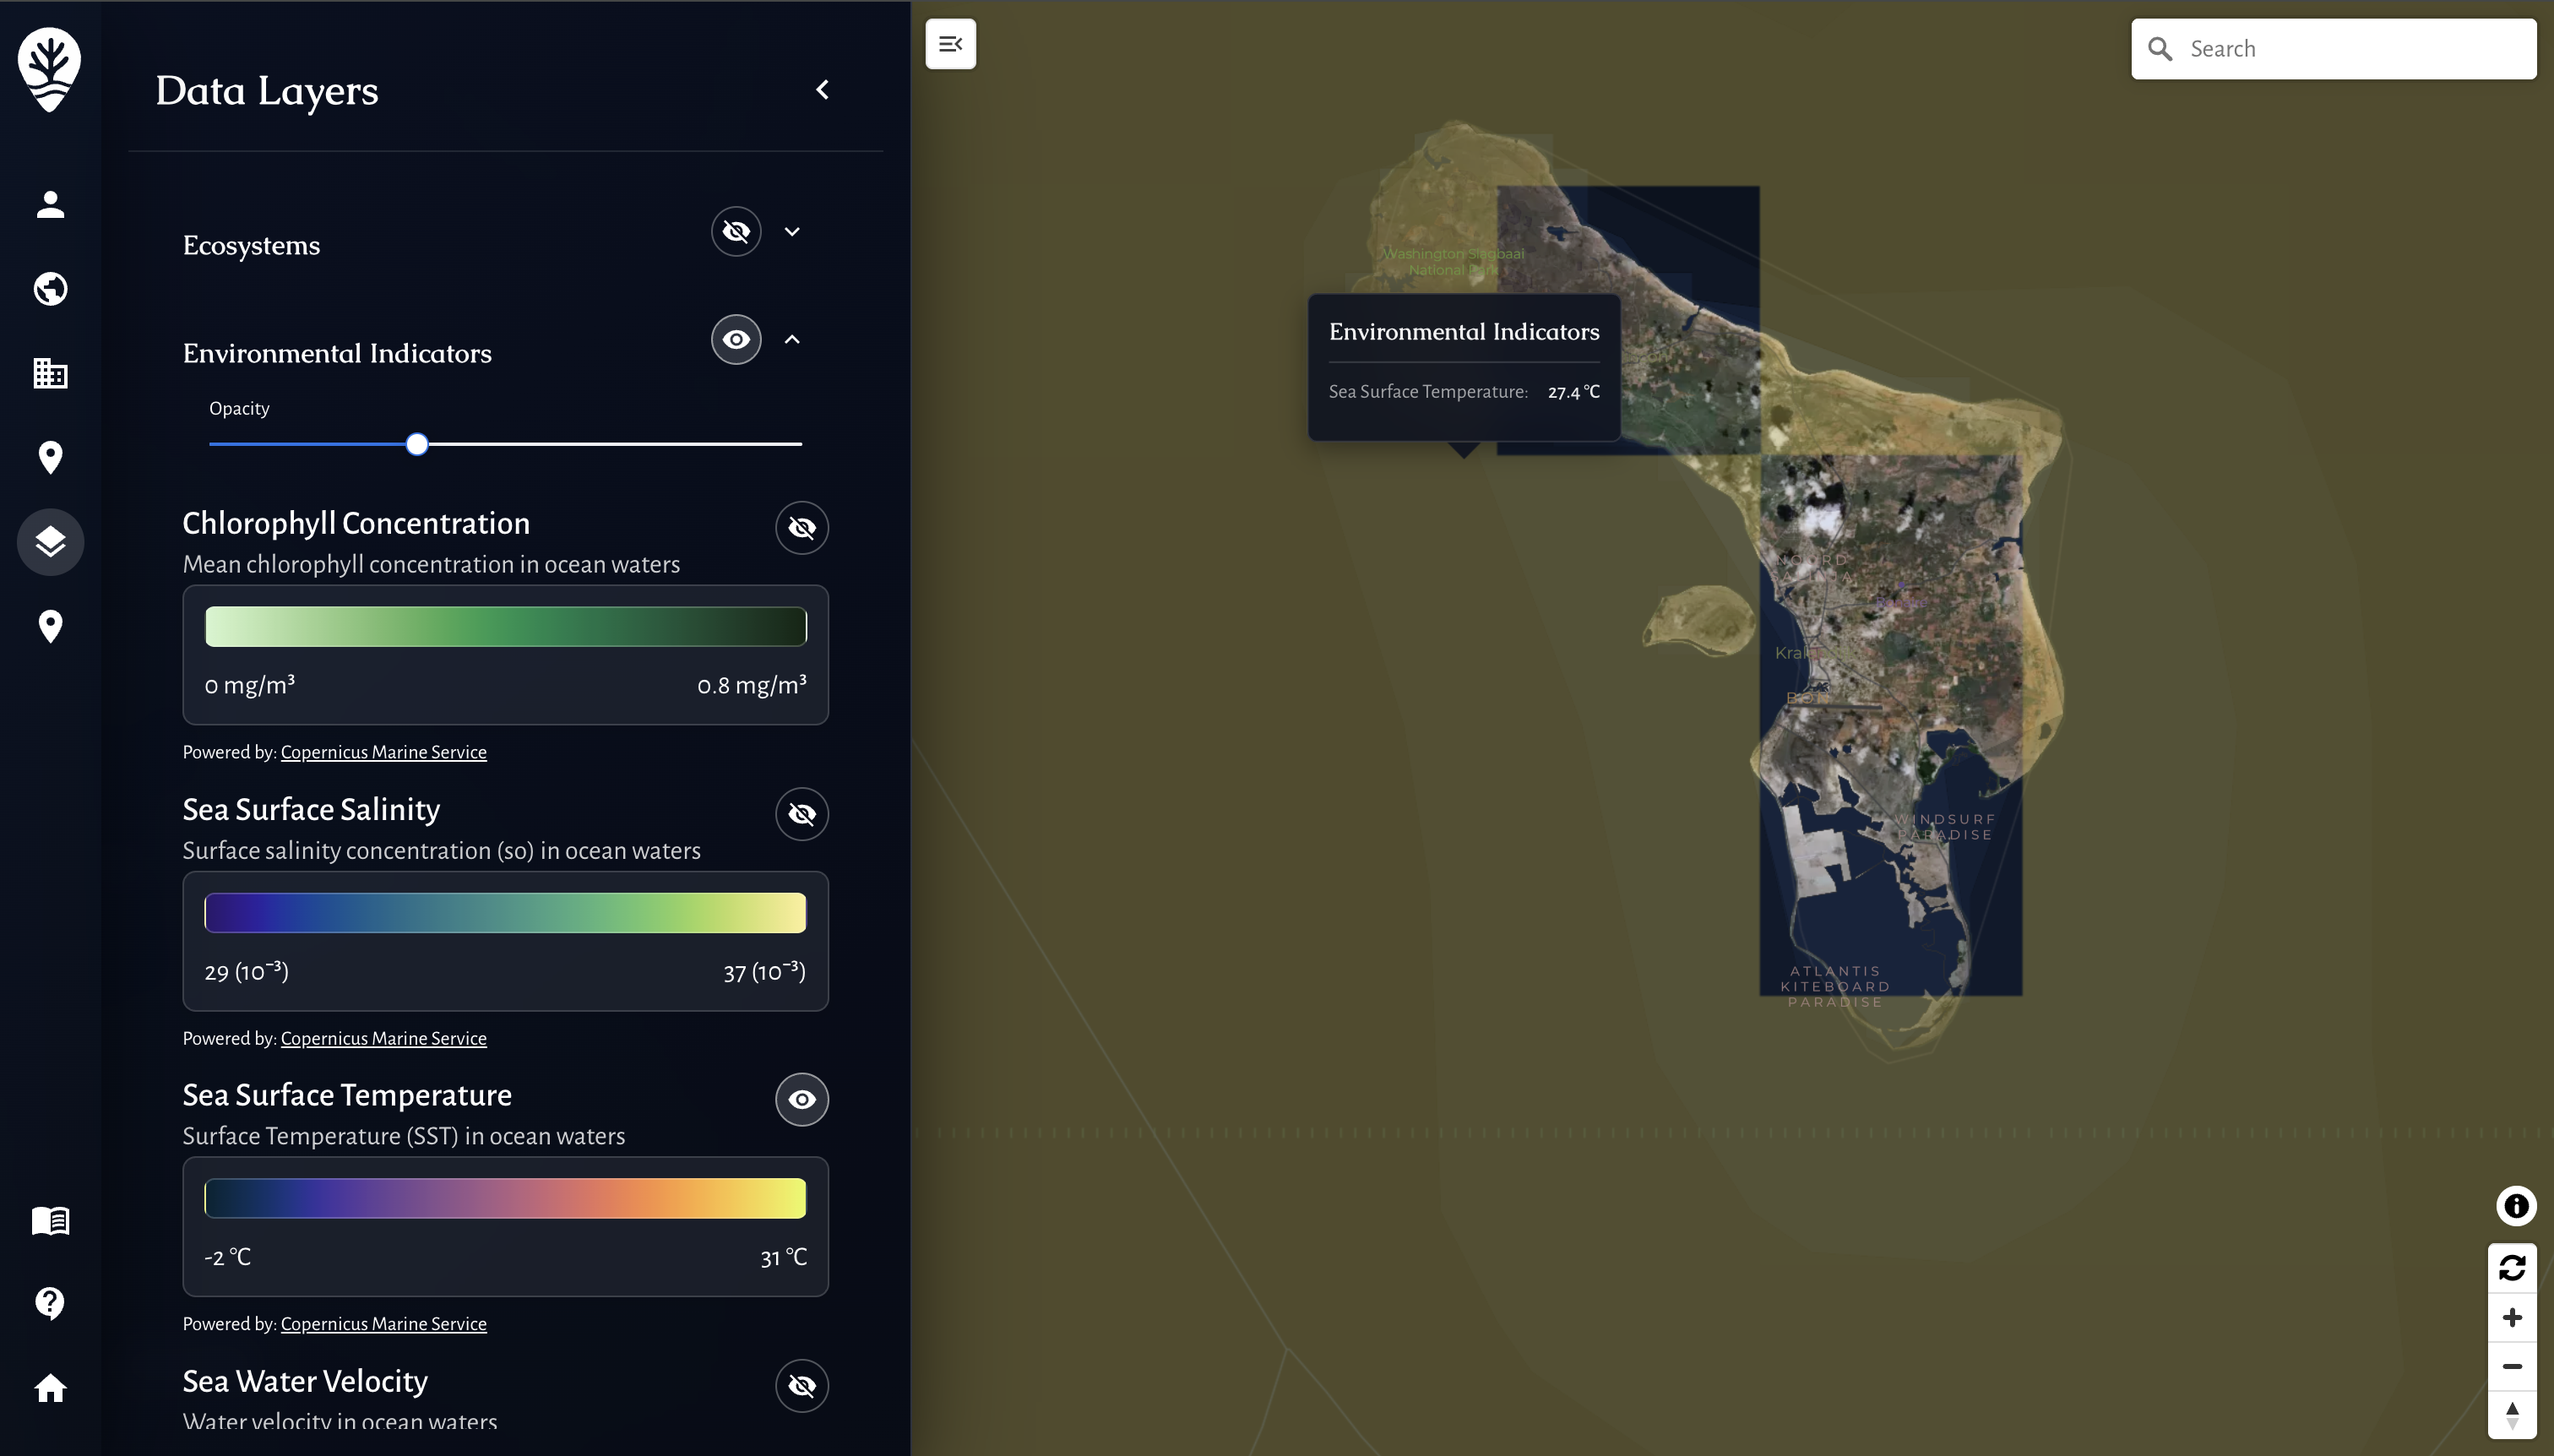
- Use habitat layers (if available) to align coral, seagrass, or mangrove boundaries.
Common issues
- “Please select a project first”: choose a project in the top bar.
- Boundary won’t save: the polygon must be valid and have at least three points.
- Wrong protocols later: update the site type in Edit site details.
MRV readiness and disclosure alignment
- Baseline vs repeat surveys: mark baselines and keep repeat surveys on comparable geometry.
- Monitoring plan logic: define cadence, QA/QC thresholds, and conservative handling of uncertainty.
- Outcome types and claims discipline: record uplift, avoided loss, or maintenance credits; separate inputs from verified outcomes.
- Rights and integrity: document FPIC, customary marine tenure, OECM, ICCA, benefit sharing, durability mechanisms, and leakage risk.
- Disclosure alignment: map indicators to TNFD, CSRD, ESRS, EU Taxonomy, SBTN, and SBTi requirements.
- Use the Metrics Reference and Data Providers for definitions and sources.
Related guides
- Getting Started with MariMap
- Planning Surveys and Data Collection
- Coral Restoration Workflows in MariMap
References